To back up a Kubernetes cluster, you start with etcd: a snapshot of its database contains every object in the cluster, and it is the only thing that lets you get them back after the control plane is lost or a namespace is deleted. This lesson is for administrators of a kubeadm cluster (advanced level, CKA preparation). It teaches you to take that snapshot, to restore it into a new directory, and then to complement it with a backup of a namespace's objects, of the volumes, and with a strategy that you test.
What you will learn
- Take an etcd snapshot with
etcdctl snapshot save, reading the endpoints and certificates from the etcd static Pod manifest (the file from which the kubelet starts etcd), then verify it withetcdutl. - Install
etcdutlon a node and verify the downloaded archive. - Restore the snapshot into a new data directory with
etcdutl, then point etcd at it by editing its manifest. - Put the control plane manifests back to restart the API server on the restored
database, and see the nodes become
Readyagain. - Check that the objects come back with their UID and that whatever was created after the backup is gone.
- Back up the objects of a namespace and say what
kubectl get -o yamldoes not back up. - Build a strategy: frequency, copy off the node, restore test.
Prerequisites
A kubeadm cluster whose control plane you administer, with sudo access to the
node (the lesson Install a cluster with kubeadm
builds one), and the basics of the
etcd database: member,
quorum, Raft log.
Why is backing up Kubernetes clusters essential?
A cluster loses its state in three ways: a human error (a deleted namespace), a failure (the disk or the control plane node disappears) or a failed upgrade. Kubernetes deployments are not immutable: every change can introduce a bug or delete a useful resource. Without a backup, configurations, Secrets and volume data leave with the cluster.
Some organizations also have regulatory obligations. The GDPR, for example, lists among the security measures to implement "as appropriate" (Article 32, paragraph 1, point c) the ability to restore the availability of and access to personal data in a timely manner in the event of an incident. Depending on the assessed risk, a backup strategy then becomes not only good practice but an obligation.
Two questions guide the strategy: how long can you stay without your cluster, and how much data can you afford to lose?
Which components should you back up?
Backing up a Kubernetes cluster is not just a matter of copying a few files: you first need to know what to back up. Not every element of the cluster is critical, but some are essential for a working restore. Here are the four that matter:
1. Cluster state (etcd)
The heart of the cluster is etcd. It is a distributed key-value database that holds the entire state of the cluster: running pods, services, secrets, ConfigMaps, roles, bindings, and so on. Without etcd, the cluster no longer knows anything about what it was supposed to run.
Without a copy of this database, it is impossible to rebuild the environment as it was. It is therefore the first component to back up regularly, especially if your resources are created directly in the cluster (rather than redeployed through GitOps or CI/CD).
2. Persistent volumes (PVs)
Your applications' data (databases, files, user documents) is stored in persistent volumes. This data is not managed by Kubernetes directly but by the underlying storage system (through CSI).
If you host stateful applications such as PostgreSQL, Elasticsearch or Nextcloud, backing up their volumes is not optional. Without it, you will restore the cluster and find the applications empty.
3. Configuration (ConfigMaps, Secrets)
ConfigMaps and Secrets are often neglected, but they hold critical settings: database connections, API keys, configuration paths, runtime options. After a restore, without them your application will not restart properly, or not at all.
4. Application resources
Finally, you need to include all the Kubernetes resources that make up your applications: Deployments, StatefulSets, Services, Ingress, NetworkPolicies, and so on. They define the architecture of your application and its behavior in the cluster.
Even if some of them can be redeployed through a CI/CD pipeline, having a complete copy in the backups lets you restore faster in an emergency or a total disaster.
How do you back up and restore etcd?
An etcd snapshot is a consistent copy of the whole database at a given moment. It contains every Kubernetes object, Secrets included, but no volume data. It is the only artifact that lets you rebuild a cluster whose control plane is lost: it is therefore treated as sensitive data, encrypted and stored outside the cluster. It is taken from a single member, because Raft guarantees that the members hold the same data, and the operation does not interrupt the service.
Where do you read the endpoints and certificates?
With kubeadm, etcd runs as a static Pod on the control plane: a Pod that the
kubelet starts itself from a manifest file placed in a directory of the node,
without going through the API server. The etcd manifest,
/etc/kubernetes/manifests/etcd.yaml, contains everything etcdctl and
etcdutl need: the listen address, the certificate paths, the data directory
and the member identity. Read it rather than copying paths from memory, because
they vary from one cluster to another.
sudo grep -E -- '--(data-dir|name|initial-cluster|initial-advertise-peer-urls|listen-client-urls|cert-file|key-file|trusted-ca-file)=' /etc/kubernetes/manifests/etcd.yaml - --cert-file=/etc/kubernetes/pki/etcd/server.crt - --data-dir=/var/lib/etcd - --initial-advertise-peer-urls=https://10.10.50.11:2380 - --initial-cluster=k8s-cp.lab=https://10.10.50.11:2380 - --key-file=/etc/kubernetes/pki/etcd/server.key - --listen-client-urls=https://127.0.0.1:2379,https://10.10.50.11:2379 - --name=k8s-cp.lab - --trusted-ca-file=/etc/kubernetes/pki/etcd/ca.crtEach option found maps to a parameter of the commands that follow.
--listen-client-urls gives the endpoint, and --trusted-ca-file, --cert-file
and --key-file give --cacert, --cert and --key. --data-dir, --name,
--initial-cluster and --initial-advertise-peer-urls will be used for the
restore. One question remains: which directory of the node holds the database?
The container reads its data from --data-dir, but that directory comes from the
node through a hostPath volume, which mounts a directory of the node into the
container. The hostPath of the data therefore designates the directory that the
restore will replace with a new one.
sudo grep -B1 -A2 'hostPath' /etc/kubernetes/manifests/etcd.yaml volumes: - hostPath: path: /etc/kubernetes/pki/etcd type: DirectoryOrCreate name: etcd-certs - hostPath: path: /var/lib/etcd type: DirectoryOrCreateThe second volume is the data one: the node mounts /var/lib/etcd onto the
container's --data-dir. The name of this volume, etcd-data in a kubeadm
manifest, is on the next line, outside this excerpt.
Backup and restore are done on the control plane node: it is the one that hosts
etcd, the certificates in /etc/kubernetes/pki/etcd and port 2379. The commands
below therefore run on that node, with etcdctl and etcdutl installed. We do
not go through kubectl exec for the restore: the API server is stopped during
the operation, so kubectl no longer answers, and etcdutl has to read the
snapshot on the node's disk. For a simple backup, a kubectl exec into the etcd
container remains possible, provided you write the snapshot into /var/lib/etcd,
the data volume mounted from the node.
After the restore taught below, this volume corresponds to /var/lib/etcd-restaure on the node: the file is read there, and a cp from /var/lib/etcd on the node fails.
The next section installs the two tools on the node.
How do you install etcdctl and etcdutl on a node?
etcdctl and etcdutl ship in the same archive as etcd, published with each
etcd release: take the one matching
the cluster, 3.7.0 with kubeadm 1.37. The outputs below come from a recording of
13 November 2026 made on the k8s-cp.lab control plane, where you also do the
installation. You download the archive and the SHA256SUMS file that lists its
digest. The grep keeps only the line for your archive, because SHA256SUMS
contains one line per published archive, and sha256sum -c recomputes the
file's digest to compare it.
curl -fsSLO https://github.com/etcd-io/etcd/releases/download/v3.7.0/etcd-v3.7.0-linux-amd64.tar.gz && curl -fsSLO https://github.com/etcd-io/etcd/releases/download/v3.7.0/SHA256SUMS && grep ' etcd-v3.7.0-linux-amd64.tar.gz$' SHA256SUMS | sha256sum -c -etcd-v3.7.0-linux-amd64.tar.gz: OKOK means the downloaded file is the one the project published. Any other
answer (FAILED) means you must throw the archive away and download it
again. You then extract only etcdctl and etcdutl, with a single tar -xzf,
and install them in /usr/local/bin with mode 0755 (readable and executable by
everyone, writable by root only).
tar -xzf etcd-v3.7.0-linux-amd64.tar.gz etcd-v3.7.0-linux-amd64/etcdctl etcd-v3.7.0-linux-amd64/etcdutlsudo install -m 0755 etcd-v3.7.0-linux-amd64/etcdctl etcd-v3.7.0-linux-amd64/etcdutl /usr/local/bin/ls -l /usr/local/bin/etcdctl /usr/local/bin/etcdutl-rwxr-xr-x 1 root root 16756898 Nov 13 21:17 /usr/local/bin/etcdctl-rwxr-xr-x 1 root root 16453794 Nov 13 21:17 /usr/local/bin/etcdutlBoth binaries belong to root and have mode rwxr-xr-x. Then check with
etcdctl version and etcdutl version that both tools report the same version
before you start:
etcdctl version; etcdutl versionetcdctl version: 3.7.0API version: 3.7etcdutl version: 3.7.0API version: 3.7How do you take and verify a snapshot?
etcdctl is the client that talks to the running etcd server: it creates the
snapshot. etcdutl is the tool shipped with etcd that works directly on files,
without a server: it verifies and restores the snapshot. Reuse the values from
the manifest for the backup. The file path is the one from the recording:
/var/lib/dsoxlab-sauvegardes is a directory of your choice, reserved for
backups, and the date appears in the file name. First create this directory,
reserved to root, since the snapshot contains the cluster's Secrets:
sudo install -d -m 0700 /var/lib/dsoxlab-sauvegardessudo etcdctl --endpoints=https://127.0.0.1:2379 \ --cacert=/etc/kubernetes/pki/etcd/ca.crt \ --cert=/etc/kubernetes/pki/etcd/server.crt \ --key=/etc/kubernetes/pki/etcd/server.key \ snapshot save /var/lib/dsoxlab-sauvegardes/etcd-20261113-175107.dbDo not put ETCDCTL_API=3 in front of the command: with etcd 3.7, version 3 is
the only API, and the variable triggers an unrecognized environment variable
warning.
{"level":"info","ts":"2026-11-13T17:51:07.930872Z","caller":"snapshot/v3_snapshot.go:83","msg":"created temporary db file","path":"/var/lib/dsoxlab-sauvegardes/etcd-20261113-175107.db.part"}{"level":"info","ts":"2026-11-13T17:51:07.934958Z","logger":"client","caller":"v3/maintenance.go:236","msg":"opened snapshot stream; downloading"}{"level":"info","ts":"2026-11-13T17:51:07.938707Z","caller":"snapshot/v3_snapshot.go:96","msg":"fetching snapshot","endpoint":"https://127.0.0.1:2379"}{"level":"info","ts":"2026-11-13T17:51:07.998613Z","logger":"client","caller":"v3/maintenance.go:302","msg":"completed snapshot read; closing"}{"level":"info","ts":"2026-11-13T17:51:08.038858Z","caller":"snapshot/v3_snapshot.go:111","msg":"fetched snapshot","endpoint":"https://127.0.0.1:2379","size":"13 MB","took":"107.956555ms","etcd-version":"3.7.0"}{"level":"info","ts":"2026-11-13T17:51:08.038941Z","caller":"snapshot/v3_snapshot.go:121","msg":"saved","path":"/var/lib/dsoxlab-sauvegardes/etcd-20261113-175107.db"}Snapshot saved at /var/lib/dsoxlab-sauvegardes/etcd-20261113-175107.dbServer version 3.7.0Look at the end: the Snapshot saved at line followed by the path confirms the
copy, and fetched snapshot gives the size (13 MB) and the duration (about
0.1 s on this small cluster). The file is first written as .part and then
renamed: a leftover .part signals an interrupted backup, not to be taken
for a valid one.
A remark about --cert: the server.crt certificate is used by the etcd server
and can also serve as a client certificate. The healthcheck-client.crt
certificate, which kubeadm creates for etcdctl, is reserved for clients and
works too: it is the one the script in the strategy section uses.
Then verify the file with etcdutl, and not with etcdctl:
sudo etcdutl snapshot status /var/lib/dsoxlab-sauvegardes/etcd-20261113-175107.db --write-out=table┌──────────┬──────────┬────────────┬────────────┬─────────┐│ HASH │ REVISION │ TOTAL KEYS │ TOTAL SIZE │ VERSION │├──────────┼──────────┼────────────┼────────────┼─────────┤│ 8b9416f8 │ 40012 │ 856 │ 13 MB │ 3.7.0 │└──────────┴──────────┴────────────┴────────────┴─────────┘Look first at TOTAL KEYS, which must be greater than zero: a file with no key
restores nothing. REVISION gives the state of the database at the time of the
copy, and VERSION the etcd version that produced it. The values in this table
are those of the recording; yours will be different.
The file itself must be readable by root only, because it contains the cluster's Secrets. The recording confirmed it:
sudo ls -l /var/lib/dsoxlab-sauvegardes/etcd-20261113-175107.db-rw------- 1 root root 13262880 Nov 13 17:51 /var/lib/dsoxlab-sauvegardes/etcd-20261113-175107.dbThe trap lies in etcdctl snapshot status, removed since etcd 3.6: the command
does not fail, it prints the help of snapshot and exits with 0. A script
that verifies its snapshot this way believes it did so and checks nothing.
The same trap exists for the restore. Recorded on 13 November 2026 with etcd 3.7.0, etcdctl snapshot restore /tmp/x.db with no option prints the help of snapshot and exits with code 0, restoring nothing: a script that only looks at the return code believes the restore is done. With the --data-dir option, the command fails with code 1:
Error: unknown flag: --data-dirIn 3.7, etcdctl snapshot only has the save subcommand: restore and status are in etcdutl.
A snapshot left on the node it protects is useless the day that node disappears: copy it off the node right away, encrypted, as the strategy below describes.
How do you restore etcd into a new directory?
Restoring does not inject data into a live cluster: etcdutl creates a new
data directory from the snapshot, and then etcd starts again on it.
Everything written after the snapshot is lost, and the cluster restarts with a
new Raft log. It is a last-resort maneuver, to be rehearsed first on a test
cluster. Before starting, take a fresh backup of the current state: you never
restore without having copied what you are about to overwrite.
Writing the data is the easy part: etcdutl writes into a new directory, and a
still-running etcd does not prevent it. The point to watch is the order of the
static Pods. You move their manifests out of the directory the kubelet watches,
then you wait until the kubelet has noticed they are gone, that is, has stopped
the containers. You put the manifests back only after the restore.
The kubelet only rereads the manifest directory at a regular interval: if you put
the manifests back too early, it notices nothing and the API server container
keeps running. Yet the
Kubernetes documentation
(read on 13 November 2026) says to not restore etcd while an API server is
running. So you wait until crictl shows no container anymore.
The following diagram shows the sequence. It starts with the backup of the current state, which you do before the six numbered steps below, which carry the same numbers in the diagram. Look mostly at two boxes: waiting for the containers to disappear (step 2), and putting the manifests back (step 5), which restarts the API server on the restored database.
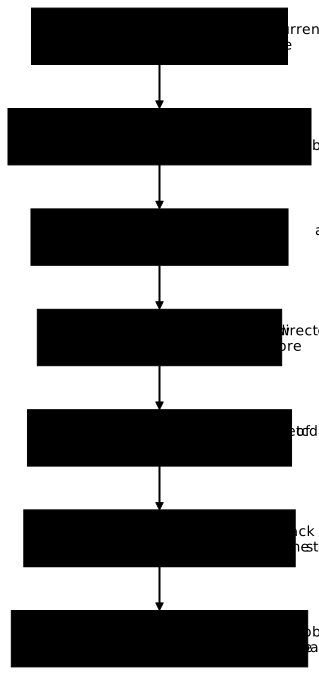
-
Move the manifests out of the watched directory
The four control plane static Pods leave together: the controller-manager and the scheduler are thus restarted too, as the Kubernetes documentation recommends after a restore. The manifests go into a directory of your own, where you will edit the etcd one.
Terminal window sudo mkdir -p /root/manifestes-arretes && sudo sh -c 'mv /etc/kubernetes/manifests/*.yaml /root/manifestes-arretes/' && sudo ls /etc/kubernetes/manifests /root/manifestes-arretesOutput /etc/kubernetes/manifests:/root/manifestes-arretes:etcd.yamlkube-apiserver.yamlkube-controller-manager.yamlkube-scheduler.yamlThe manifest directory is empty and the four files are in the holding directory. Note the
sudo sh -c '...': a wildcard such as*.yamlis expanded by your shell beforesudostarts. If your user cannot read the target directory, the pattern matches no file and nothing is moved. Handed tosh -c, the wildcard is expanded by root, who reads every directory. Step 5 depends on it, since the manifests are then in/root. -
Check that the containers are gone
kubectlcannot be used here: it goes through the API server, which the previous step stopped.crictl, the client of the node's container runtime, queries that runtime directly and remains usable.Terminal window sudo crictl ps --name etcdsudo crictl ps --name kube-apiserverOutput, about thirty seconds after the move CONTAINER IMAGE CREATED STATE NAME ATTEMPT POD ID POD NAMESPACEEach command now shows only the header line: no container. The recording waited about 30 s before getting this result, because the kubelet only rereads the directory at a regular interval: rerun the commands until the list is empty. As long as a container line appears, the kubelet has not yet noticed that the manifests are gone: do not put them back before.
-
Restore the snapshot into a directory that does not exist yet
Terminal window sudo etcdutl snapshot restore /var/lib/dsoxlab-sauvegardes/etcd-20261113-175107.db \--name k8s-cp.lab \--initial-cluster k8s-cp.lab=https://10.10.50.11:2380 \--initial-advertise-peer-urls https://10.10.50.11:2380 \--data-dir /var/lib/etcd-restaureThe three values
--name,--initial-clusterand--initial-advertise-peer-urlsare the ones read from the manifest. The target directory must be new:etcdutlrefuses an existing directory that is not empty.With etcd 3.7,
etcdctlcan no longer restore a snapshot: itssnapshot restorecommand was removed in 3.6, andetcdutldoes the job.Always pass these three options, even though
etcdutlaccepts to go without them. Without them, it creates the member with its default values: the peer URLhttp://localhost:2380and a different ID (8e9e05c52164694dinstead of2e830b06b400c72b).The recording of 13 November 2026 verified this by restoring the same snapshot without these options, then starting a separate etcd 3.7.0, outside the cluster, on that directory, with the manifest's values. etcd answered
server has already been initialized: on an already initialized directory, it ignores the--initial-*options, andetcdctl member liststill showedhttp://localhost:2380. A single member works that way, but this peer URL is wrong for any member that wants to join it.Output 2026-11-13T17:51:42Z info snapshot/v3_snapshot.go:306 restoring snapshot {"path": "/var/lib/dsoxlab-sauvegardes/etcd-20261113-175107.db", "wal-dir": "/var/lib/etcd-restaure/member/wal", "data-dir": "/var/lib/etcd-restaure", "snap-dir": "/var/lib/etcd-restaure/member/snap", "initial-memory-map-size": 10737418240}2026-11-13T17:51:42Z info schema/membership.go:125 Trimming membership information from the backend...2026-11-13T17:51:43Z info membership/cluster.go:408 added member {"cluster-id": "7c1bdae565b42bbc", "local-member-id": "0", "added-peer-id": "2e830b06b400c72b", "added-peer-peer-urls": ["https://10.10.50.11:2380"], "added-peer-is-learner": false}2026-11-13T17:51:43Z info snapshot/v3_snapshot.go:334 restored snapshot {"path": "/var/lib/dsoxlab-sauvegardes/etcd-20261113-175107.db", "wal-dir": "/var/lib/etcd-restaure/member/wal", "data-dir": "/var/lib/etcd-restaure", "snap-dir": "/var/lib/etcd-restaure/member/snap", "initial-memory-map-size": 10737418240}The last line,
restored snapshot, confirms that the data directory is written, with itsmember/snapandmember/walsubdirectories. Theadded memberline shows the member ID,2e830b06b400c72b: you will find it identical after the restore. -
Point etcd at the restored directory
In the
/root/manifestes-arretes/etcd.yamlcopy, change only thehostPathof the data volume. The container still sees/var/lib/etcd; it is the node that now mounts the new directory.Terminal window sudo sed -i 's#path: /var/lib/etcd$#path: /var/lib/etcd-restaure#' /root/manifestes-arretes/etcd.yaml && sudo grep -B1 -A2 'hostPath' /root/manifestes-arretes/etcd.yamlOutput volumes:- hostPath:path: /etc/kubernetes/pki/etcdtype: DirectoryOrCreatename: etcd-certs- hostPath:path: /var/lib/etcd-restauretype: DirectoryOrCreateThe second
hostPathnow designates the restored directory; the certificates one did not move. Do not change--data-dirinstead: etcd would start empty, in a container directory where nothing is mounted. -
Put the manifests back and restart the kubelet
Terminal window sudo sh -c 'mv /root/manifestes-arretes/*.yaml /etc/kubernetes/manifests/' && sudo ls /etc/kubernetes/manifestssudo systemctl restart kubelet && systemctl is-active kubeletOutput etcd.yamlkube-apiserver.yamlkube-controller-manager.yamlkube-scheduler.yamlactiveThe four manifests are back and the kubelet is active: it recreates the four static Pods. The recording measured about 6 s before the API answered. Wait until the
kubectl get --raw /readyzcommand printsok: the API is ready at that point. -
Check that the cluster is healthy
Terminal window kubectl get nodesOutput NAME STATUS ROLES AGE VERSIONk8s-cp.lab Ready control-plane 3h25m v1.37.2k8s-w1.lab Ready <none> 3h21m v1.37.2Both nodes are
Ready. If the command fails for a few seconds, that is normal: the API server is still starting.
After these six steps, etcd runs on /var/lib/etcd-restaure, but kubeadm's
configuration still points to /var/lib/etcd. The restore only changes the etcd
manifest: the kubeadm-config ConfigMap in the kube-system namespace, where
kubeadm rereads its configuration, is untouched. Compare the two values:
kubectl -n kube-system get configmap kubeadm-config -o yaml | grep dataDirsudo grep -A1 'hostPath' /etc/kubernetes/manifests/etcd.yaml | grep path dataDir: /var/lib/etcd path: /etc/kubernetes/pki/etcd path: /var/lib/etcd-restaureThe ConfigMap says /var/lib/etcd, while the manifest mounts
/var/lib/etcd-restaure. This gap matters, because kubeadm regenerates
etcd.yaml from the ConfigMap's dataDir, for example during an upgrade. The
command sudo kubeadm init phase etcd local --config <file> --dry-run, fed with
the ClusterConfiguration read from the ConfigMap, shows it without writing
anything: with dataDir: /var/lib/etcd, the generated manifest has
--data-dir=/var/lib/etcd and path: /var/lib/etcd; with
dataDir: /var/lib/etcd-restaure, it has /var/lib/etcd-restaure in both
places. An unprepared regeneration would therefore bring etcd back onto the
old directory.
Once the restore is validated, carry the new directory over into the ConfigMap, then reread the value:
kubectl -n kube-system get configmap kubeadm-config -o yaml | sed 's#dataDir: /var/lib/etcd$#dataDir: /var/lib/etcd-restaure#' | kubectl replace -f -kubectl -n kube-system get configmap kubeadm-config -o yaml | grep dataDirconfigmap/kubeadm-config replaced dataDir: /var/lib/etcd-restaureBoth writes work: this page's procedure only changes the hostPath and leaves
--data-dir=/var/lib/etcd in the container, whereas kubeadm, when regenerating
the manifest, changes the hostPath and --data-dir. Do not delete the old
/var/lib/etcd until the restore is validated: it is the only trace of the
previous state.
The Kubernetes documentation
says to stop all API server instances before restoring etcd, then to restart
them: removing the manifest, seeing the container stop, then putting it back
together with the etcd one respects that order. It also recommends restarting
kube-scheduler, kube-controller-manager and the kubelet, so that none relies
on stale data, and specifies that, during the restore, the critical components
lose their leader lock and restart by themselves.
The procedure above applies these recommendations: moving the four manifests
out and back restarts the three control plane Pods, and
sudo systemctl restart kubelet restarts the kubelet.
Right after the API comes back, kubectl get pods -n kube-system often shows
the control plane Pods as 0/1 Running:
NAME READY STATUS RESTARTS AGEcoredns-559f6c778d-rmllc 1/1 Running 0 3h25mcoredns-559f6c778d-tbbnz 1/1 Running 0 3h25metcd-k8s-cp.lab 0/1 Running 0 1skube-apiserver-k8s-cp.lab 0/1 Running 2 (5s ago) 3h25mkube-controller-manager-k8s-cp.lab 0/1 Running 0 3h25mkube-proxy-w6vfw 1/1 Running 0 3h21mkube-proxy-zwlbn 1/1 Running 0 3h25mkube-scheduler-k8s-cp.lab 0/1 Running 0 3h25mThis is not a failure: the static Pods have just restarted and their readiness
probe has not succeeded yet. Rerun the command after a few seconds and they go
to 1/1. Also note the age of etcd-k8s-cp.lab, 1s: it is the container that
was just recreated on the restored directory.
On a cluster with several control planes, each member is restored from the same
snapshot, with its own --name and its own peer addresses, and
--initial-cluster lists all the members, in the form
name1=https://ip1:2380,name2=https://ip2:2380. The lesson's procedure covers a
single control plane, the one from the recording.
How do you check that a restore really happened?
Do not rely on a change of member identity: etcd computes a member's identity
from its peer URLs and the cluster token, and with identical parameters it does
not change. The recording confirms it: the following command returns the same
table before and after the restore, with the ID 2e830b06b400c72b.
sudo etcdctl --endpoints=https://127.0.0.1:2379 \ --cacert=/etc/kubernetes/pki/etcd/ca.crt \ --cert=/etc/kubernetes/pki/etcd/server.crt \ --key=/etc/kubernetes/pki/etcd/server.key \ member list -w table┌──────────────────┬─────────┬────────────┬──────────────────────────┬──────────────────────────┬────────────┐│ ID │ STATUS │ NAME │ PEER ADDRS │ CLIENT ADDRS │ IS LEARNER │├──────────────────┼─────────┼────────────┼──────────────────────────┼──────────────────────────┼────────────┤│ 2e830b06b400c72b │ started │ k8s-cp.lab │ https://10.10.50.11:2380 │ https://10.10.50.11:2379 │ false │└──────────────────┴─────────┴────────────┴──────────────────────────┴──────────────────────────┴────────────┘What starts from zero is the Raft log. endpoint status shows it right after the
restore:
sudo etcdctl --endpoints=https://127.0.0.1:2379 \ --cacert=/etc/kubernetes/pki/etcd/ca.crt \ --cert=/etc/kubernetes/pki/etcd/server.crt \ --key=/etc/kubernetes/pki/etcd/server.key \ endpoint status -w table┌────────────────────────┬──────────────────┬─────────┬─────────────────┬─────────┬────────┬───────────────────────┬────────┬───────────┬────────────┬───────────┬────────────┬────────────────────┬────────┬──────────────────────────┬───────────────────┐│ ENDPOINT │ ID │ VERSION │ STORAGE VERSION │ DB SIZE │ IN USE │ PERCENTAGE NOT IN USE │ QUOTA │ IS LEADER │ IS LEARNER │ RAFT TERM │ RAFT INDEX │ RAFT APPLIED INDEX │ ERRORS │ DOWNGRADE TARGET VERSION │ DOWNGRADE ENABLED │├────────────────────────┼──────────────────┼─────────┼─────────────────┼─────────┼────────┼───────────────────────┼────────┼───────────┼────────────┼───────────┼────────────┼────────────────────┼────────┼──────────────────────────┼───────────────────┤│ https://127.0.0.1:2379 │ 2e830b06b400c72b │ 3.7.0 │ 3.7.0 │ 13 MB │ 4.5 MB │ 67% │ 2.1 GB │ true │ false │ 2 │ 35 │ 35 │ │ │ false │└────────────────────────┴──────────────────┴─────────┴─────────────────┴─────────┴────────┴───────────────────────┴────────┴───────────┴────────────┴───────────┴────────────┴────────────────────┴────────┴──────────────────────────┴───────────────────┘Read the RAFT TERM and RAFT INDEX columns: the term is 2 and the index 35,
very low values for a cluster that had been running for more than three hours.
The new log restarted from the snapshot, while the member ID did not move.
The check that proves more looks at the data: the objects must come back with their original UID, because a namespace recreated by hand gets a new UID, and an object written after the snapshot must be gone. The UID is the unique identifier that Kubernetes assigns to an object when it creates it. The following demonstration plays this check end to end.
Demo: recover a deleted namespace
This walkthrough plays the incident end to end on a test namespace, with the
outputs of the 13 November 2026 recording. The UIDs are specific to your
cluster: note them, they serve as proof at the end. The kubectl commands run
with the administrator kubeconfig, for example /etc/kubernetes/admin.conf on
the control plane.
-
Create a test namespace with a ConfigMap, and note their UIDs
Terminal window kubectl create namespace essai-restaurationkubectl create configmap config-essai -n essai-restauration --from-literal=cle=valeurkubectl get namespace essai-restauration -o jsonpath='{.metadata.uid}{"\n"}'kubectl get configmap config-essai -n essai-restauration -o jsonpath='{.metadata.uid}{"\n"}'Output namespace/essai-restauration createdconfigmap/config-essai createdccf58784-127e-442b-b4c3-aed5655756a2760818b5-b4dd-4be1-bde0-c5e1772461dfThe last two lines are the UIDs of the namespace and of the ConfigMap: they will serve as proof in step 5.
-
Take the snapshot, then verify it
Reuse the two commands from the section "How do you take and verify a snapshot?" (
etcdctl snapshot save, thenetcdutl snapshot status). Then create an object that will not exist in the snapshot.Terminal window kubectl create configmap bruit-apres-sauvegarde -n default --from-literal=a=bOutput configmap/bruit-apres-sauvegarde created -
Trigger the incident
Terminal window kubectl delete namespace essai-restaurationkubectl get namespace essai-restaurationOutput namespace "essai-restauration" deletedError from server (NotFound): namespaces "essai-restauration" not foundThe namespace no longer exists. In a real recovery, now take a fresh backup of this state into another file, before restoring.
-
Restore
Run, without changing anything, the six steps of the section "How do you restore etcd into a new directory?" with the snapshot from step 2 as the file to restore.
-
Compare
Terminal window kubectl get namespace essai-restauration -o jsonpath='{.metadata.uid}{"\n"}'kubectl get configmap config-essai -n essai-restauration -o jsonpath='{.metadata.uid}{"\n"}'kubectl get configmap bruit-apres-sauvegarde -n defaultOutput ccf58784-127e-442b-b4c3-aed5655756a2760818b5-b4dd-4be1-bde0-c5e1772461dfError from server (NotFound): configmaps "bruit-apres-sauvegarde" not foundThe namespace and its ConfigMap are back, with the same UIDs as in step 1. The
bruit-apres-sauvegardeConfigMap, created after the snapshot, answersNotFound.
The result reads in two parts: the identical UIDs prove that the data comes from the snapshot and not from a recreation, and the vanished object proves that the cluster went back to its earlier state.
Which backup strategy for etcd?
The snapshot frequency sets the maximum acceptable data loss: with one backup per hour, a restore brings the cluster back, at worst, to its state of an hour ago. The other rows of the table protect the snapshot itself, which is worth nothing if it stays on the node that just burned or if it was never read back. The durations in the table are starting points, to adjust to the data loss you accept.
| Item | Recommendation |
|---|---|
| Frequency | Hourly at the very least, every 15 minutes for a critical cluster |
| Retention | 7 days minimum, 30 days recommended |
| Storage | Outside the cluster (S3, GCS, external NFS) |
| Encryption | GPG or equivalent, before sending |
| Test | Monthly restore on a test cluster |
This script chains the steps that make a usable backup: create the snapshot,
verify its integrity right after, then purge the archives beyond the retention.
The set -euo pipefail at the top makes the script fail at the first problem,
instead of letting a scheduled task report a success on an empty file. The
TOTAL KEYS check uses jq to read etcdutl's JSON output, and refuses a
snapshot with no key: install jq on the node before running the script
(sudo apt install jq on Debian or Ubuntu). The script runs as root, for
example from root's crontab, because it reads the private keys in
/etc/kubernetes/pki/etcd. The certificate paths are kubeadm's, to adapt
elsewhere.
#!/bin/bashset -euo pipefail
# ConfigurationBACKUP_DIR="/backup/etcd"RETENTION_DAYS=7TIMESTAMP=$(date +%Y%m%d-%H%M%S)SNAPSHOT_FILE="${BACKUP_DIR}/etcd-snapshot-${TIMESTAMP}.db"
# Certificats (kubeadm - adapter selon votre distribution)CACERT="/etc/kubernetes/pki/etcd/ca.crt"CERT="/etc/kubernetes/pki/etcd/healthcheck-client.crt"KEY="/etc/kubernetes/pki/etcd/healthcheck-client.key"ENDPOINTS="https://127.0.0.1:2379"
# Créer le répertoire de backup, réservé à root (l'instantané contient les Secrets)install -d -m 0700 "${BACKUP_DIR}"
# Créer le snapshotetcdctl snapshot save "${SNAPSHOT_FILE}" \  --cacert="${CACERT}" \  --cert="${CERT}" \  --key="${KEY}" \  --endpoints="${ENDPOINTS}"
# Vérifier l'intégrité (etcdutl, pas etcdctl) et refuser un instantané videTOTAL_KEYS=$(etcdutl snapshot status "${SNAPSHOT_FILE}" --write-out=json | jq -r '.totalKey')if [ "${TOTAL_KEYS:-0}" -le 0 ]; then  echo "Instantané vide ou illisible : ${SNAPSHOT_FILE}" >&2  exit 1fietcdutl snapshot status "${SNAPSHOT_FILE}" --write-out=table
# Supprimer les vieux backupsfind "${BACKUP_DIR}" -name "etcd-snapshot-*.db" -mtime +${RETENTION_DAYS} -delete
echo "Backup terminé : ${SNAPSHOT_FILE}"
The script stops in the local directory: you still need to copy the file off the node and encrypt it. The sections "Secure the backups" and "Test the restores" below give the principles, without a command.
Back up a namespace's objects, and why kubectl is not enough
Of the four components above, two already have their answer: etcd has just been covered, and volumes depend on your storage system. What remains is the objects of a namespace, which many people think they back up with a single command. It exists, and its result cannot be restored.
The raw export, and what it really contains
The mon-app test namespace contains a Deployment web with two replicas, a
Service, a ConfigMap reglages and a Secret acces. The 13 November 2026
recording (kubeadm v1.37.2) creates them with a busybox image pinned by digest,
then waits for both Pods to be ready.
kubectl create namespace mon-appkubectl -n mon-app create deployment web --image=busybox:1.38.0@sha256:a46257e06c82ad85242d0d38077d0a52d9896389ca60a1a59d3463db586e5fa4 --replicas=2 -- sleep 3600kubectl -n mon-app expose deployment web --port=80 --target-port=8080kubectl -n mon-app create configmap reglages --from-literal=mode=productionkubectl -n mon-app create secret generic acces --from-literal=jeton=s3cr3tkubectl -n mon-app rollout status deployment/web --timeout=120snamespace/mon-app createddeployment.apps/web createdservice/web exposedconfigmap/reglages createdsecret/acces createdWaiting for deployment "web" rollout to finish: 0 of 2 updated replicas are available...Waiting for deployment "web" rollout to finish: 1 of 2 updated replicas are available...deployment "web" successfully rolled outThe last line confirms that the Deployment is ready. Then you export everything the command designates, in a single file:
kubectl get all,configmap,secret,ingress,pvc -n mon-app -o yaml > mon-app.yamlThe all category notably groups Pods, Services, Deployments and ReplicaSets.
The 14,523-byte file therefore also contains the two Pods and the ReplicaSet that
the Deployment created, and the kube-root-ca.crt ConfigMap that Kubernetes
places in every namespace. It also carries the identity fields that the cluster
manages itself. The recording counted them with grep -c:
| Field searched | Occurrences in the file |
|---|---|
uid: | 13 |
resourceVersion: | 9 |
creationTimestamp: | 8 |
managedFields: | 0 |
No managedFields: kubectl get -o yaml hides them by default, and
--show-managed-fields displays them. The other three fields, on the other hand,
are in the export, and that is what gets in the way of a replay.
Now replay this file on a namespace that is deleted and then recreated:
kubectl delete namespace mon-app --wait=truekubectl create namespace mon-appkubectl apply -f mon-app.yamlpod/web-b58c67d99-48t26 createdpod/web-b58c67d99-w4q2c createdservice/web createddeployment.apps/web createdWarning: resource configmaps/kube-root-ca.crt is missing the kubectl.kubernetes.io/last-applied-configuration annotation which is required by kubectl apply. [...]configmap/reglages createdsecret/acces createdError from server (AlreadyExists): error when creating "mon-app.yaml": replicasets.apps "web-b58c67d99" already existsError from server (Conflict): error when applying patch:[...]to:Resource: "/v1, Resource=configmaps", GroupVersionKind: "/v1, Kind=ConfigMap"Name: "kube-root-ca.crt", Namespace: "mon-app"for: "mon-app.yaml": error when patching "mon-app.yaml": Operation cannot be fulfilled on configmaps "kube-root-ca.crt": the object has been modified; please apply your changes to the latest version and try againThe Deployment, the Service, the ConfigMap and the Secret are recreated, but the
command exits with return code 1, because of two errors. AlreadyExists: the
recreated Deployment has already built its own ReplicaSet, with the same name as
the one in the file. Conflict: Kubernetes itself recreated kube-root-ca.crt
in the new namespace, and the file opposes it with the identity of the old one,
with its uid and its resourceVersion. Then look at the state of the
namespace:
kubectl get all,configmap,secret -n mon-appNAME READY STATUS RESTARTS AGEpod/web-b58c67d99-b7n79 1/1 Running 0 4spod/web-b58c67d99-bqscz 1/1 Running 0 4s
NAME TYPE CLUSTER-IP EXTERNAL-IP PORT(S) AGEservice/web ClusterIP 10.103.205.117 <none> 80/TCP 4s
NAME READY UP-TO-DATE AVAILABLE AGEdeployment.apps/web 2/2 2 2 4s
NAME DESIRED CURRENT READY AGEreplicaset.apps/web-b58c67d99 2 2 2 4s
NAME DATA AGEconfigmap/kube-root-ca.crt 1 5sconfigmap/reglages 1 0s
NAME TYPE DATA AGEsecret/acces Opaque 1 0sCompare the Pod names with those from the apply: b7n79 and bqscz are not
48t26 and w4q2c. The two replayed Pods are gone, replaced by the ones the
Deployment created, because their ownerReferences pointed to the old
ReplicaSet. The application runs, but it is the Deployment that rebuilt it: the
file restored nothing by itself.
The raw export is therefore not a restorable backup. For an export to be
useful, export only the objects you declare (here the Deployment, the Service,
the reglages ConfigMap and the acces Secret), without the all category,
without kube-root-ca.crt and without the identity fields.
Even well chosen, kubectl get ... -o yaml only backs up the types you name in
the command. Roles, RoleBindings, ServiceAccounts, NetworkPolicies and custom
resources only appear if you cite them, and they are easy to forget. Volume data
never goes through this command: an exported PersistentVolumeClaim describes the
storage request, not its content.
The Secret is not protected in this export
The acces Secret is exported with its value in the data field, base64
encoded: for jeton=s3cr3t, the field contains czNjcjN0 (value computed with
echo -n s3cr3t | base64, not recorded from an output). This string is not
encrypted, and a base64 -d returns the original value:
echo czNjcjN0 | base64 -ds3cr3tAnyone who opens your backup file therefore reads your tokens and passwords. That is why encrypting the backup is not a precaution but an obligation.
What to conclude
Two paths are realistic in production. The first is GitOps: the manifests
live in a repository, they are the source of truth, and you have no objects to
back up since they redeploy. The second is a dedicated tool such as Velero,
which cleans up the identity fields, handles the restore order and covers the
volumes in the same flow. The kubectl export keeps a single use: to
inspect a state before a risky manipulation.
Volume snapshots: what your cluster allows, or not
A CSI snapshot is not a Kubernetes feature but a feature of your storage driver. Before building a strategy on it, check that it exists on your side:
kubectl get volumesnapshotclassIf the API server answers that it does not know the volumesnapshotclass
resource, the snapshot resource definitions are not installed: this is the case
of a cluster that only has the default local provisioner, such as
rancher.io/local-path, which writes into a directory of the node and
does not implement snapshots. This is not a failure, it is a limit to
know: volume snapshots require a CSI driver that supports them.
Challenges and best practices
A backup strategy rarely fails for lack of a tool. It fails on data consistency, on legal obligations, on protecting the copies and on the absence of testing.
1. Ensure data consistency
Backing up Kubernetes resources without the volumes is enough for a stateless application, not for a database. The reverse is also true: volumes without the ConfigMaps or Secrets give an application that does not start. A tool such as Velero or Veeam Kasten captures the whole application in a single flow.
2. Meet regulatory requirements
The GDPR, long-term retention or access traceability influence the retention period, the encryption and the location of backups (EU or not). Involve the compliance team before choosing the storage.
3. Secure the backups
An etcd snapshot and an export contain the cluster's Secrets. Encrypt them before copying them off the node, restrict access to the storage (for example an S3 bucket with a role-based access policy) and monitor access. This page does not show an encryption command: it sticks to the principle.
4. Test the restores
A backup that was never restored proves nothing. Restore regularly, for example every month, on a test cluster: the test reveals a forgotten volume, an undocumented dependency or a version incompatibility. The demo above and the lab at the end of the page show a complete restore.
5. Document and automate
Write down where the backups are, how to restore them and who to notify. Then automate what can be: backup script, restore script, alert on a failure.
Recommended backup strategies
Three common approaches combine depending on the environment, the complexity and the budget.
Application-level backup treats each application independently: its Kubernetes resources (YAML manifests), its configurations and its data volumes. It is a granular strategy, ideal for restoring a single application without touching the rest of the cluster. It suits cases where several teams deploy on the same cluster, or where you manage critical applications to isolate.
Cluster-level backup covers the entire state: etcd, Kubernetes objects, persistent volumes, network configuration. It is the most complete method, often used in high availability or disaster recovery. It lets you rebuild a whole cluster after a major crash, but requires more storage, bandwidth and restore time.
Volume snapshots rely on storage solutions compatible with Kubernetes through CSI. They are fast and often automatable, but they are not enough alone: they cover neither the cluster state (etcd) nor the Kubernetes objects. They complement a more global strategy.
Restore considerations
A poorly prepared restore can corrupt data or create inconsistencies in the cluster. Here is what to plan for.
Before any restore, check that the backup is usable: a corrupted or
incomplete backup, or one encrypted without the decryption key, is useless.
Automate a check after each backup (checksum, etcdutl snapshot status for
etcd, error logs), and run regular dry-run restores on a test cluster.
The cluster receiving the restore must be compatible with the original environment. An etcd snapshot is not a universal format: it carries the storage schema of the version that produced it. The Kubernetes documentation states that etcd restores a snapshot taken from an etcd process of the same major.minor version, and also accepts a patch version difference (for example 3.6.2 to 3.6.5). A snapshot from another minor version is therefore not covered by this guarantee. The same goes for APIs deprecated or changed between two Kubernetes versions. Document the exact versions of Kubernetes, etcd and plugins at the time of the backup.
Restoring on the same cluster or on a different environment (cloud, another data center) does not impose the same constraints: IP addresses, volumes and storage classes may vary, and you sometimes need to adapt the manifests or the network settings. That is why portable backups are better, with generically described resources and no strong dependency on a node name or a static IP.
The restore order depends on what you restore. If you restore etcd, all objects come back at once, since they are stored in etcd: there is no order to follow between them, and only the persistent volume data remains to be brought back from its own backup.
If you restore object by object, for example with Velero, order matters, because an object often references another. A Pod that mounts a PersistentVolumeClaim stays pending as long as that PVC does not exist. This order is the one Velero applies itself, you do not have to replay it by hand: replaying exported Pods or ReplicaSets is pointless, as the export seen above shows. Here it is:
- CRDs (custom resource definitions), then namespaces
- Storage: StorageClasses, PersistentVolumes, PersistentVolumeClaims and their data
- Configuration: RBAC, Secrets, ConfigMaps
- Applications: Pods and ReplicaSets, then the other resources such as Deployments, then Services
In detail, Velero restores by default, among others, in this order: CRDs, namespaces, StorageClasses, PersistentVolumes, PersistentVolumeClaims, ClusterRoles, Roles, ServiceAccounts, ClusterRoleBindings and RoleBindings, Secrets, ConfigMaps, Pods and ReplicaSets. Resources absent from its list, such as Deployments, come next in alphabetical order, then Services (Velero documentation, "Restore Reference", read on 13 November 2026).
Backup and restore solutions
Several tools cover backup and restore in Kubernetes. None replaces the others: they cover different scopes, and the choice is made on what you need to protect.
Velero is an open source tool to back up Kubernetes resources and persistent volumes, and even to migrate workloads between clusters. It is deployed on the cluster, connects to cloud storage (S3, Azure Blob, etc.), schedules backups and lets you test restores.
Veeam Kasten for Kubernetes (formerly Kasten K10) is a commercial solution designed for the enterprise: a full graphical interface, flexible backup policies, native integration with the main cloud platforms, possible multicluster use.
Stash backs up both Kubernetes resources and databases, through integrations with Restic and VolumeSnapshotter, for complex workloads with little configuration. Check the project's activity, on its releases page, before adopting it.
Trilio for Kubernetes is another enterprise-oriented, modular solution, with protection policies and restore at different levels of granularity.
Longhorn is not a backup tool as such, but a distributed block storage for Kubernetes, which provides a CSI driver with snapshots and backups to external storage (NFS or S3). If you are looking for easy-to-install replicated storage, it lets you secure your volumes. The Longhorn guide (in French) details its installation.
Hands-on practice
An etcd restore cannot be rehearsed on a cluster in containers: you need a
real control plane, which this lab provides as a virtual machine. A namespace
has disappeared, and a backup from the day before exists in /opt/backup. You
first take a fresh backup of the current state, then you restore the cluster
from the previous day's snapshot, without leaving the API server running during
the restore. The validation checks that etcd runs on a directory produced during
the lab, that the namespace and its ConfigMap come back with their original
UID, that the object written after the backup is gone and that both nodes are
Ready.
Key takeaways
- A Kubernetes backup covers four distinct components: the cluster state in etcd, the persistent volumes, the configuration and the application resources. Backing up etcd does not protect the volume data.
etcdctlandetcdutlare installed from the official archive, whose digest you verify withsha256sum -cbefore extracting the binaries, thenetcdctl versionandetcdutl versionconfirm the version.etcdctl snapshot savetakes the snapshot, with endpoints and certificates read from the etcd static Pod manifest, withoutETCDCTL_API=3: with etcd 3.7, v3 is the only API and the variable causes a warning.etcdutl snapshot statusverifies it, becauseetcdctl snapshot statusno longer exists and still exits with 0.- Before the restore, you move the four manifests out of the directory watched by
the kubelet and you wait until the containers are gone
(
crictl ps --name etcd): the Kubernetes documentation says to not restore etcd while an API server is running. You then restore withetcdutlinto a new directory, passing--name,--initial-clusterand--initial-advertise-peer-urls, without which the member keeps the peer URLhttp://localhost:2380. The wildcard of amvundersudogoes throughsudo sh -c '...'. - etcd is then pointed at that directory by its manifest's
hostPath, then you put the manifests back and restart the kubelet: the API server restarts on the restored database. The static Pods stay a few seconds in0/1 Running: that is a normal restart. - After the restore, etcd runs on
/var/lib/etcd-restaurewhile thekubeadm-configConfigMap keepsdataDir: /var/lib/etcd, because the restore does not touch it. kubeadm regenerates the etcd manifest from that value: once the restore is validated, you carry it over into the ConfigMap and reread it withgrep dataDir, keeping the old directory until then. - A restore is proven by the original UIDs of the objects that came back and by the disappearance of what was created after the backup, not by the member's identity.
- A
kubectl get all,… -o yamlexport cannot be restored: it carries the identity fields, replays Pods that disappear and collides withkube-root-ca.crt. It covers neither Roles, nor ServiceAccounts, nor volume data, and an exported Secret is base64-encoded, not encrypted. CSI snapshots depend on the storage driver, often absent from a cluster that only has the default local provisioner. - A backup that is not tested is not a backup: copy off the node, encrypted, with a restore rehearsed every month on a test cluster.
- Restoring etcd brings back all objects at once. An object-by-object restore follows the order of CRDs, namespaces, storage, configuration, then applications.
Test your knowledge
These questions are about what separates a backup from the illusion of a backup: restoring etcd and its pitfalls, what a kubectl export does not restore, the components to cover, the restore order and what your storage driver really allows.
Knowledge check
Check what you have learned with this interactive quiz
How it works
- The timer starts when you click Start
- Multiple choice, true/false and short answer questions
- You can move between questions
- Detailed results are shown at the end
Starts the quiz and the timer
Review
(0/0)Score by domain
A domain groups several guides and gets several questions, so its score is more reliable than a per-topic score, which often rests on a single question.
Summary
Strengths
No topic passed at 80% on at least two questions yet.
Weak areas
No topic below the pass mark.
Recommended next
Hints before you try again?
Continue the course: cert-manager: automatic TLS certificates in Kubernetes
A new full quiz with random questions
Work again only on the questions you missed