This guide walks you through creating your first LXC container in Proxmox VE.
You will understand why you would pick a container rather than a VM, master the
options of the creation wizard (privileged vs unprivileged, nesting), and learn
to manage your containers from the CLI with pct. At the end, you will have a
working Debian container, ready to host your services.
What you will learn
- The difference between an LXC container and a KVM VM: when to choose which
- Privileged vs unprivileged: understanding the security implications
- Nesting: allowing Docker or other containers to run inside
- Create a container from the web interface and from the CLI with
pct - Templates: where to find them and how to download them
- The essential
pctcommands for day-to-day management
Prerequisites
| Item | Detail |
|---|---|
| Proxmox VE installed | Version 8.x or 9.x, installation guide |
| Web interface mastered | The 3 levels Datacenter → Node → Guest, interface guide |
| Storage configured | At least one storage with the "CT Templates" content type |
| Working network | A configured bridge (vmbr0 by default) |
Key concepts before you start
LXC container vs KVM VM: what is the difference?
An LXC container (Linux Container) shares the Linux kernel of the Proxmox host. Unlike a VM, which emulates a complete computer with its own kernel, the container is just an isolated process. The result: near-instant startup, minimal memory footprint, native performance.
| Criterion | KVM VM | LXC container |
|---|---|---|
| Kernel | Its own kernel (Linux, Windows, BSD...) | Host kernel (Linux only) |
| Startup | A few tens of seconds | A few seconds |
| Minimum RAM | Several hundred MB | A few tens of MB |
| Isolation | Strong (hypervisor) | Medium (namespaces + cgroups) |
| Overhead | Low on CPU, RAM reserved | Almost none |
| Supported OS | All (Windows, Linux, BSD...) | Linux only |
| Live migration | Yes | No (restart migration) |
Privileged vs unprivileged: the security choice
This is the most important question when you create a container.
| Mode | Root UID inside the container | Security | Use case |
|---|---|---|---|
| Unprivileged (default) | Mapped to UID 100000+ | Strong | Most services, preferred |
| Privileged | = host root (UID 0) | Weak | Specific cases, listed below |
Unprivileged: the container's root (UID 0) is mapped to an unprivileged user
of the host, UID 100000 by default (the table is read in /proc/self/uid_map,
see below). Even if an attacker escapes the container, they land with the rights
of an ordinary user. This is the default mode when you create a container, so
keep it unless you have a specific case.
Privileged: the container's root = the host's root. An escape flaw = root access to your server. The LXC team considers these containers insecure by design. Use them only in a trusted environment.
Nesting: containers inside the container
Nesting exposes part of /proc and /sys to the container, which allows:
- Docker or Podman inside the container
- Other nested LXC containers
- systemd to isolate its services
Nesting + unprivileged is the recommended combination for running Docker in a Proxmox container.
Download a template
Before creating a container, you need a template, a base image containing a minimal Linux system.
-
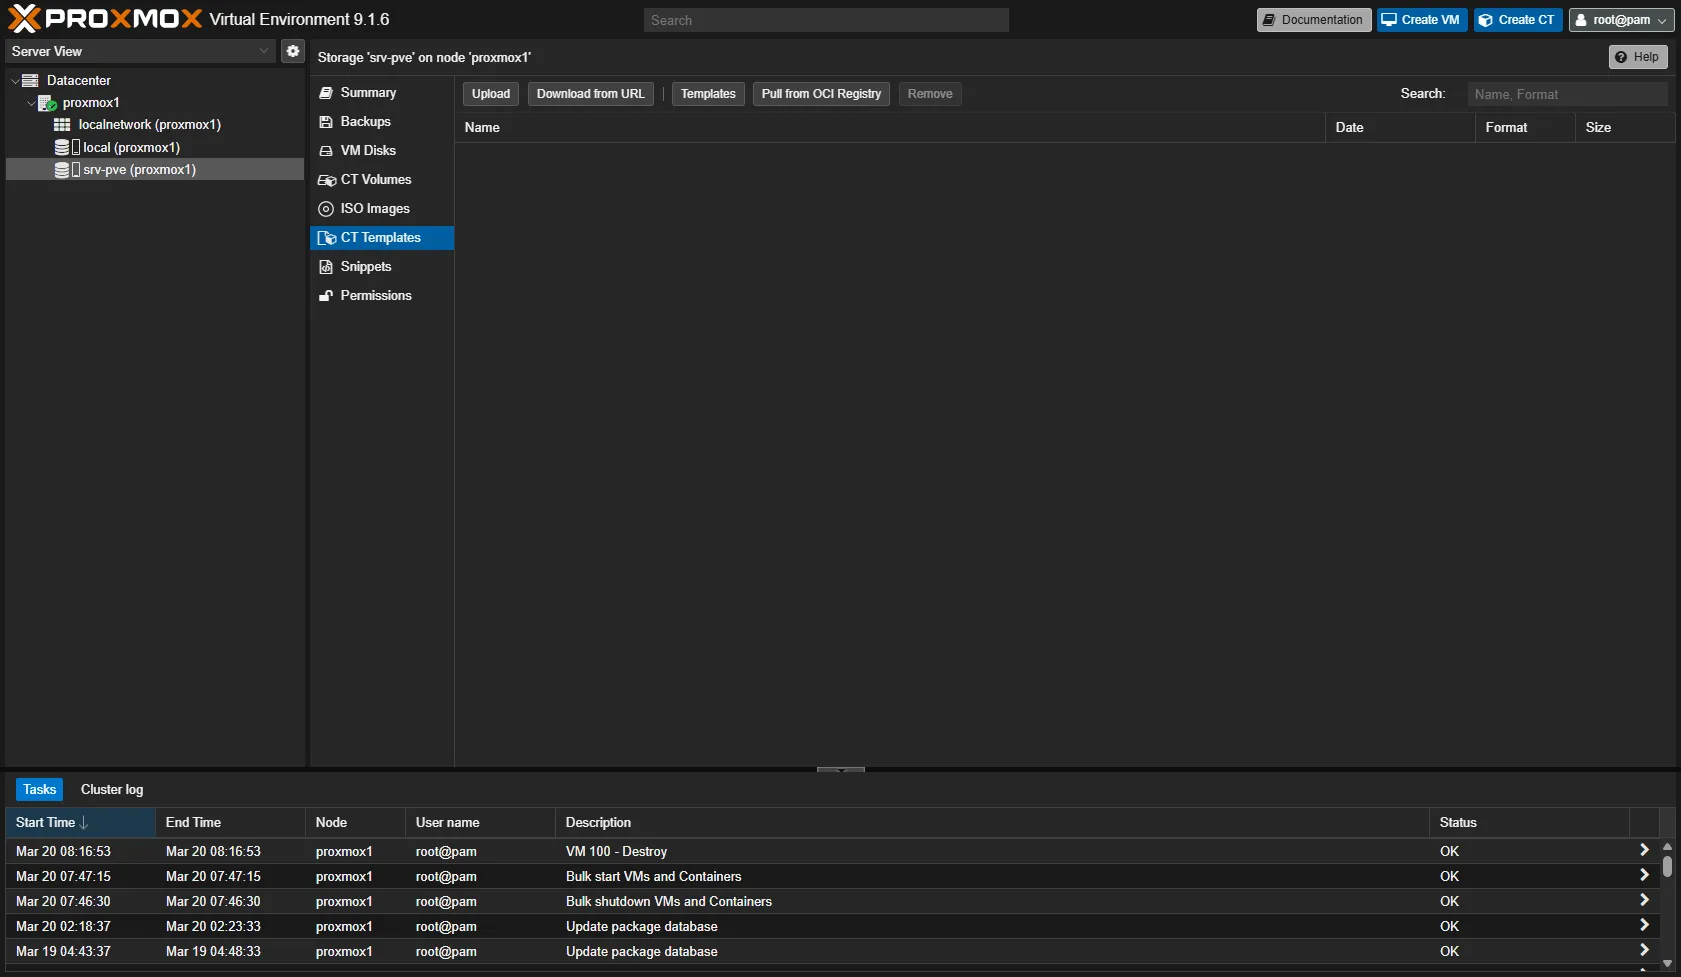
Open the template manager
In the Proxmox interface, go to: Node → local (or your storage) → CT Templates
-
Download a template from the repositories
Click the Templates button. A list of official templates appears. Select for example debian-13-standard, then click Download.
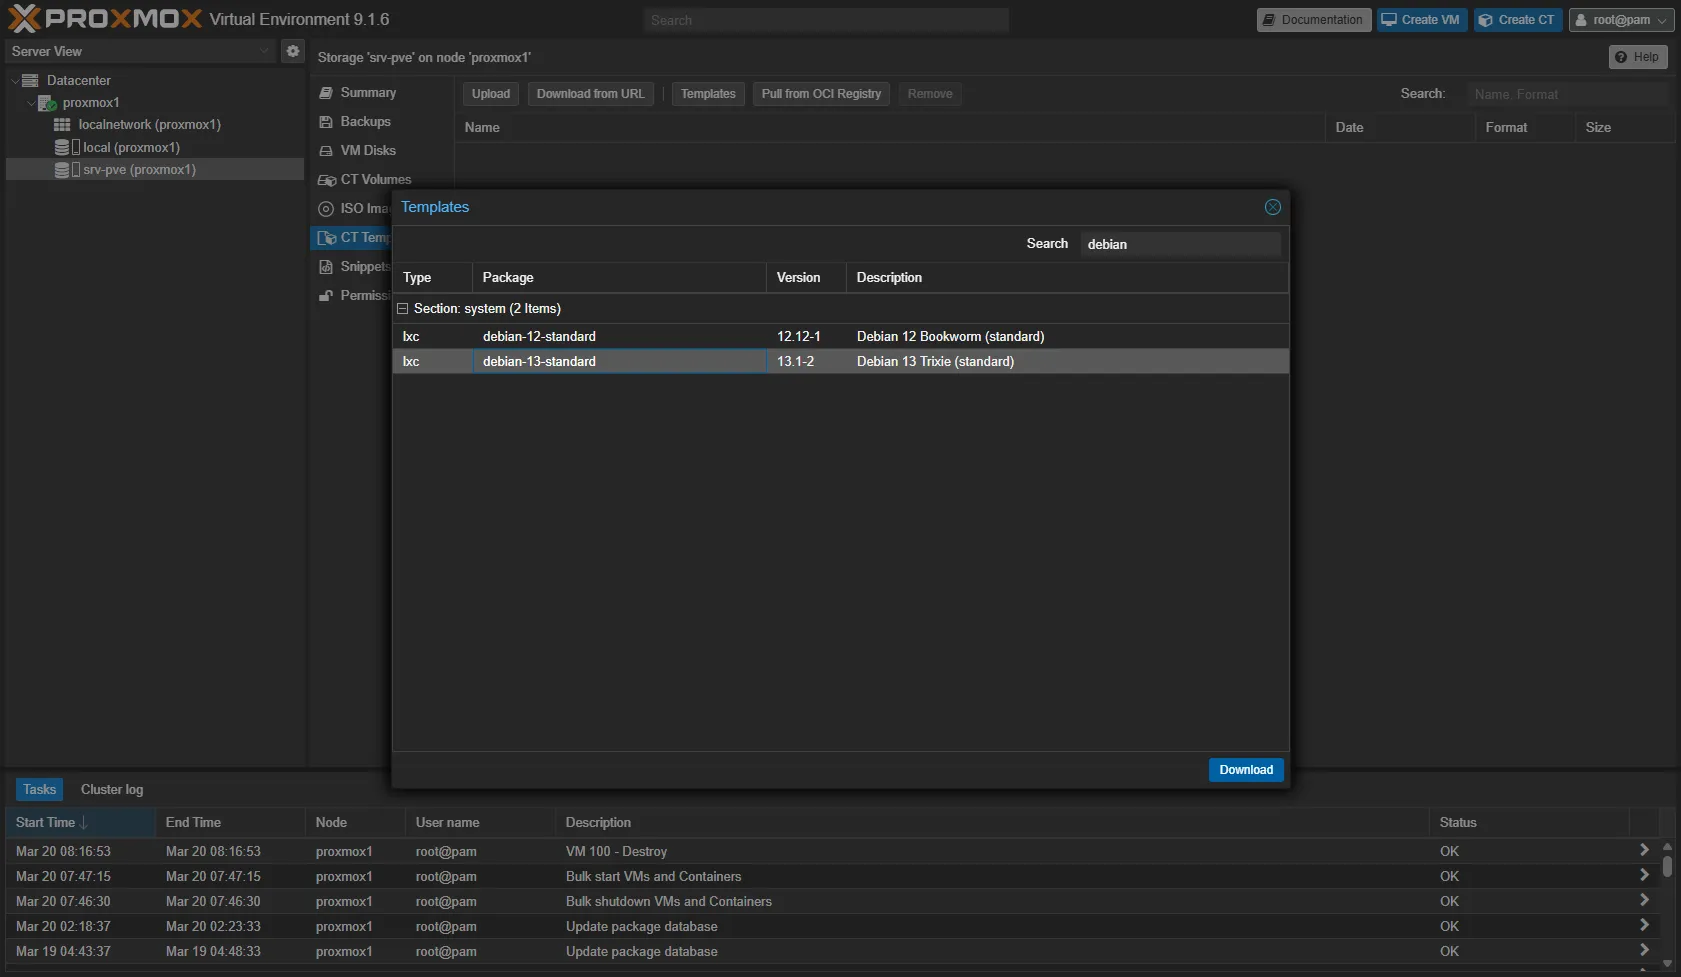
The download takes a few seconds. The template then appears in the list.
From the CLI with pveam:
# Update the list of available templatespveam update
# List the available system templatespveam available --section system
# Download a template to the local storagepveam download local debian-13-standard_13.6-1_amd64.tar.zst
# List the downloaded templatespveam list localCreate a container from the web interface
-
Start the creation wizard
Click the blue Create CT button at the top right of the interface. An 8-tab wizard opens.
-
General tab: the container's identity
Option Recommended value Explanation Node (your node) Server where the CT will be created CT ID (suggested automatically) Unique number, keep the suggested one Hostname debian-testContainer hostname Unprivileged container Checked (default) Secure mode, keep it Nesting Checked if Docker Required for Docker/systemd Password (set one) Container root password 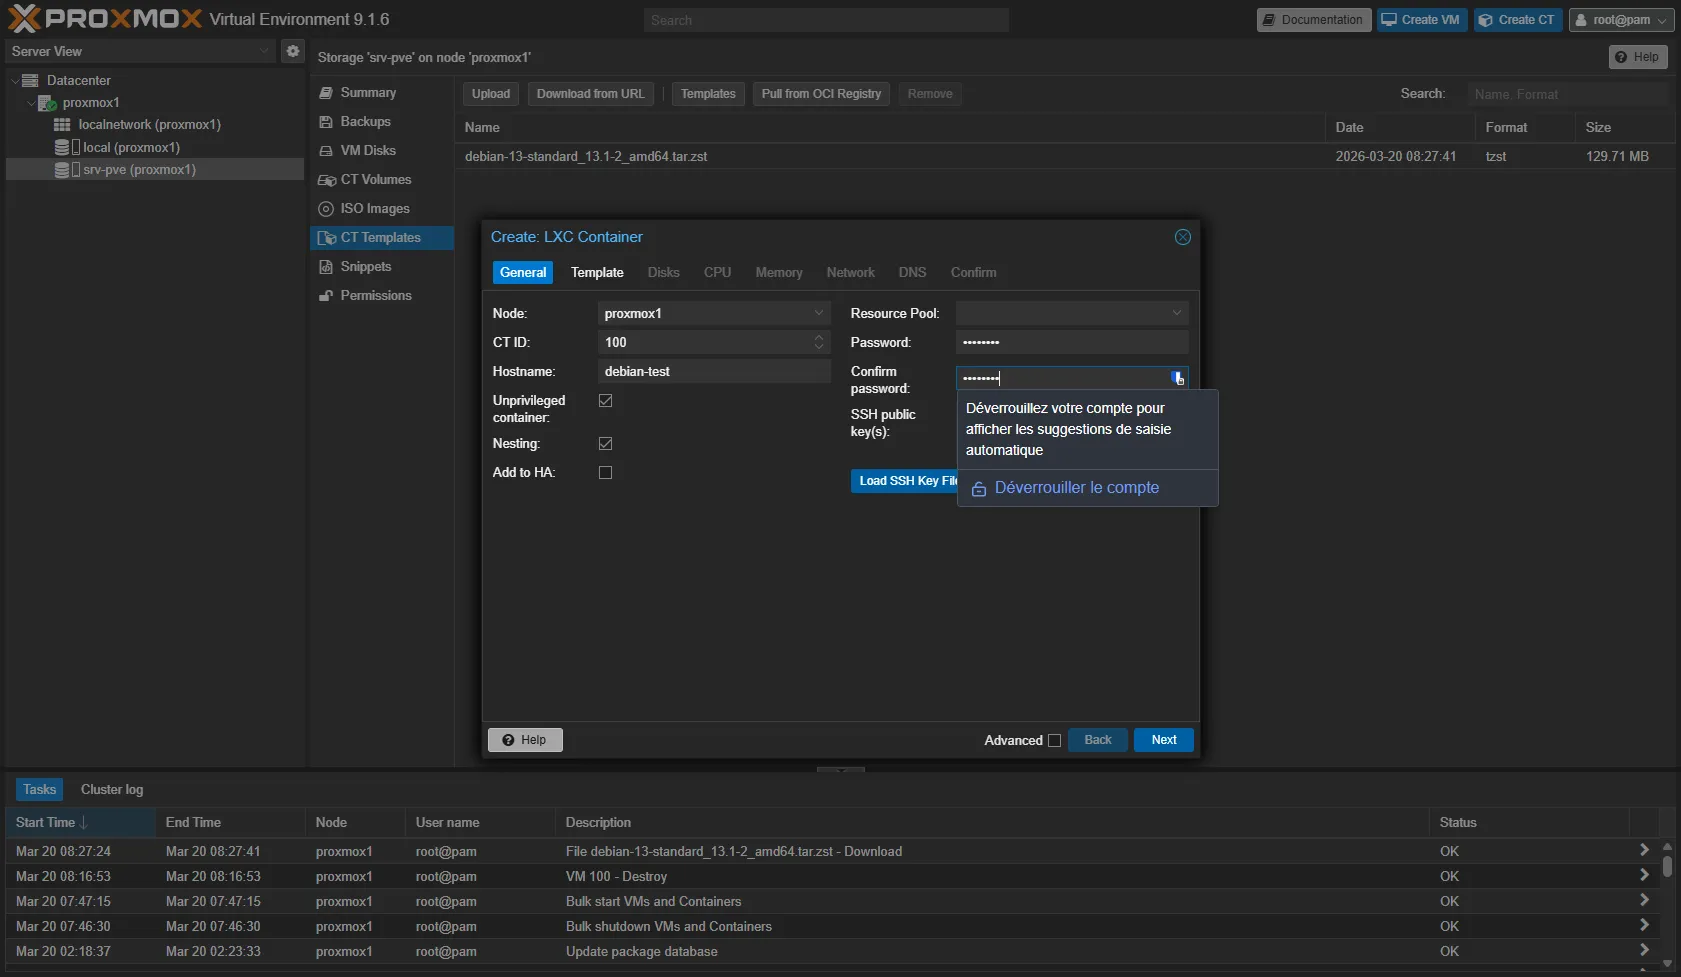
-
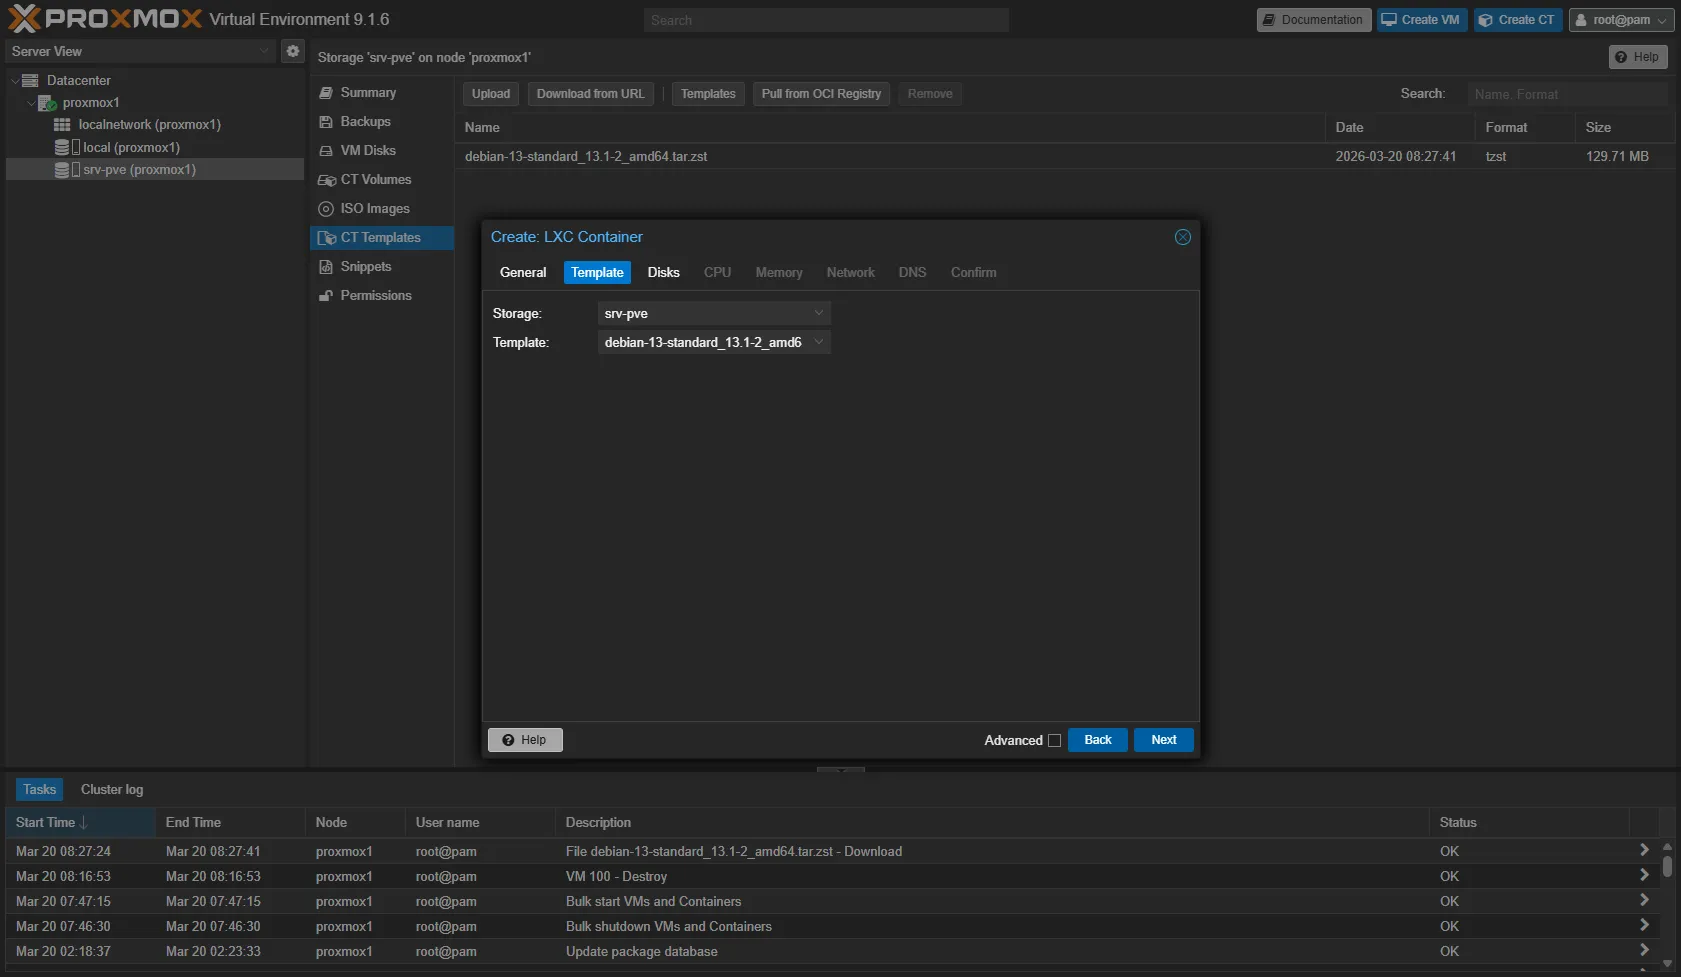
Template tab: choose the base image
- Storage:
local(or your storage with the templates) - Template:
debian-13-standard_13.6-1_amd64.tar.zst
- Storage:
-
Disks tab: the container's storage
Option Recommended value Explanation Storage local-lvmStorage for the rootfs; on a node installed on top of Debian, localDisk size (GiB) 88 GB is enough for a basic container 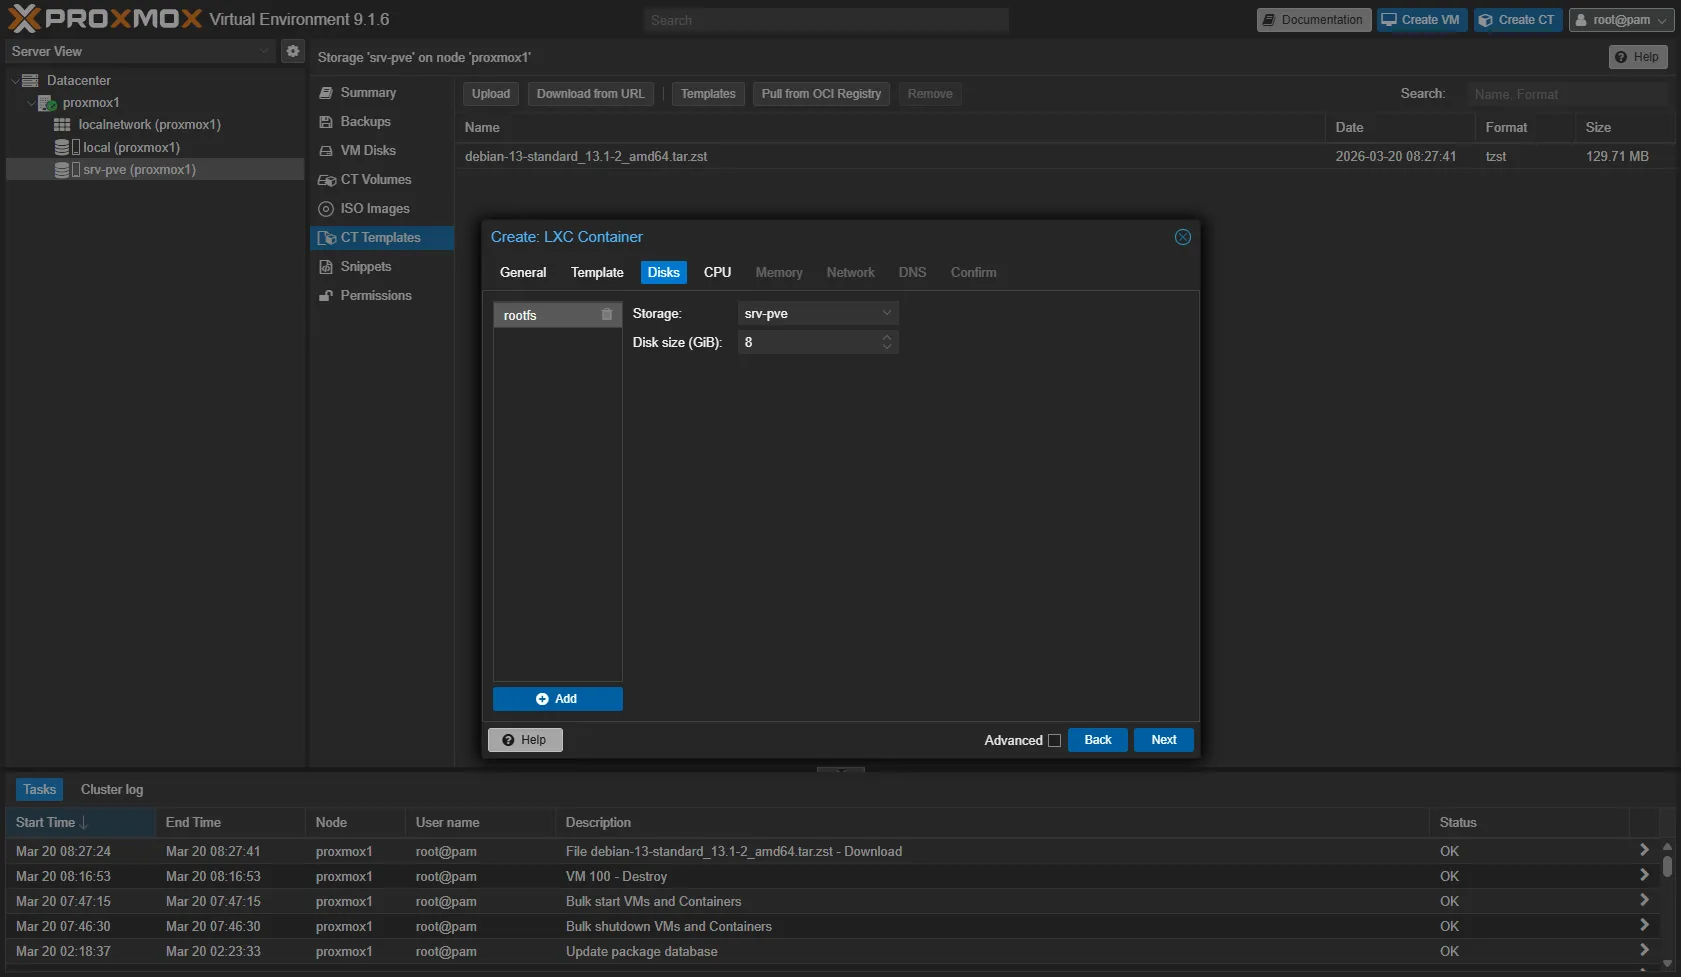
The first four steps set the container's identity, its image and its disk. The next ones set its resources and its network, then confirm the creation.
-
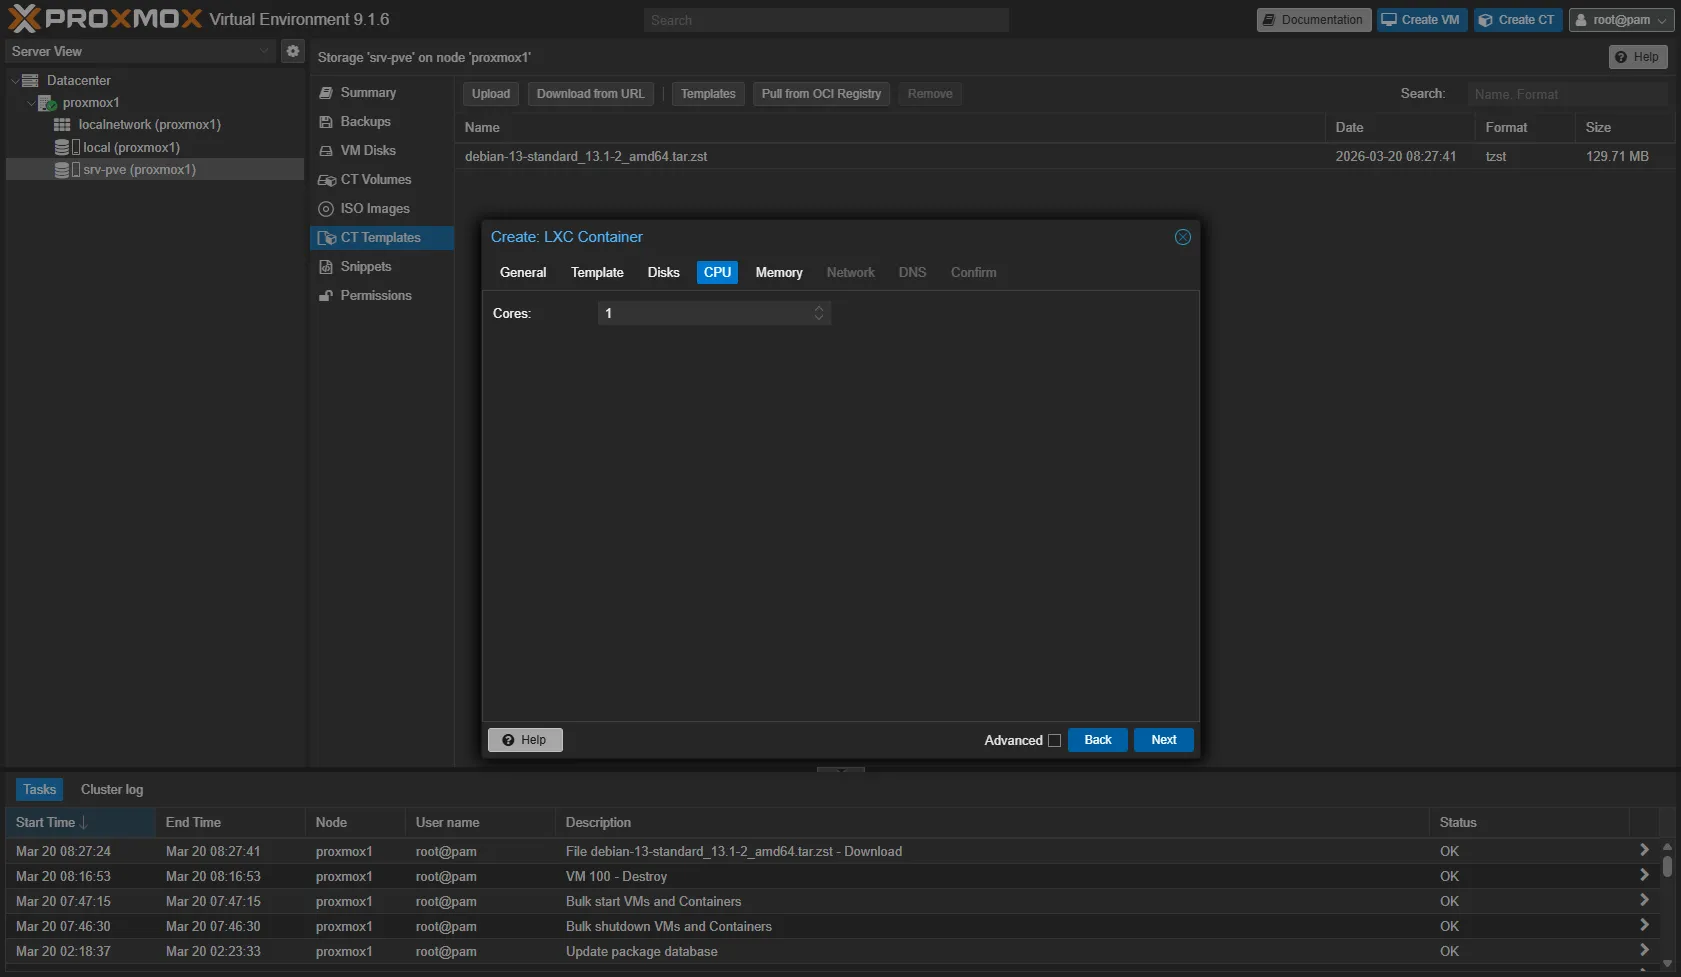
CPU tab: processor
Option Recommended value Explanation Cores 11 core is enough for most services The container can use all the host's cores if you do not specify a limit. The "Cores" value sets the maximum.
-
Memory tab: RAM
Option Recommended value Explanation Memory (MiB) 512512 MB, enough for a minimal container Swap (MiB) 512Swap allocated to the container 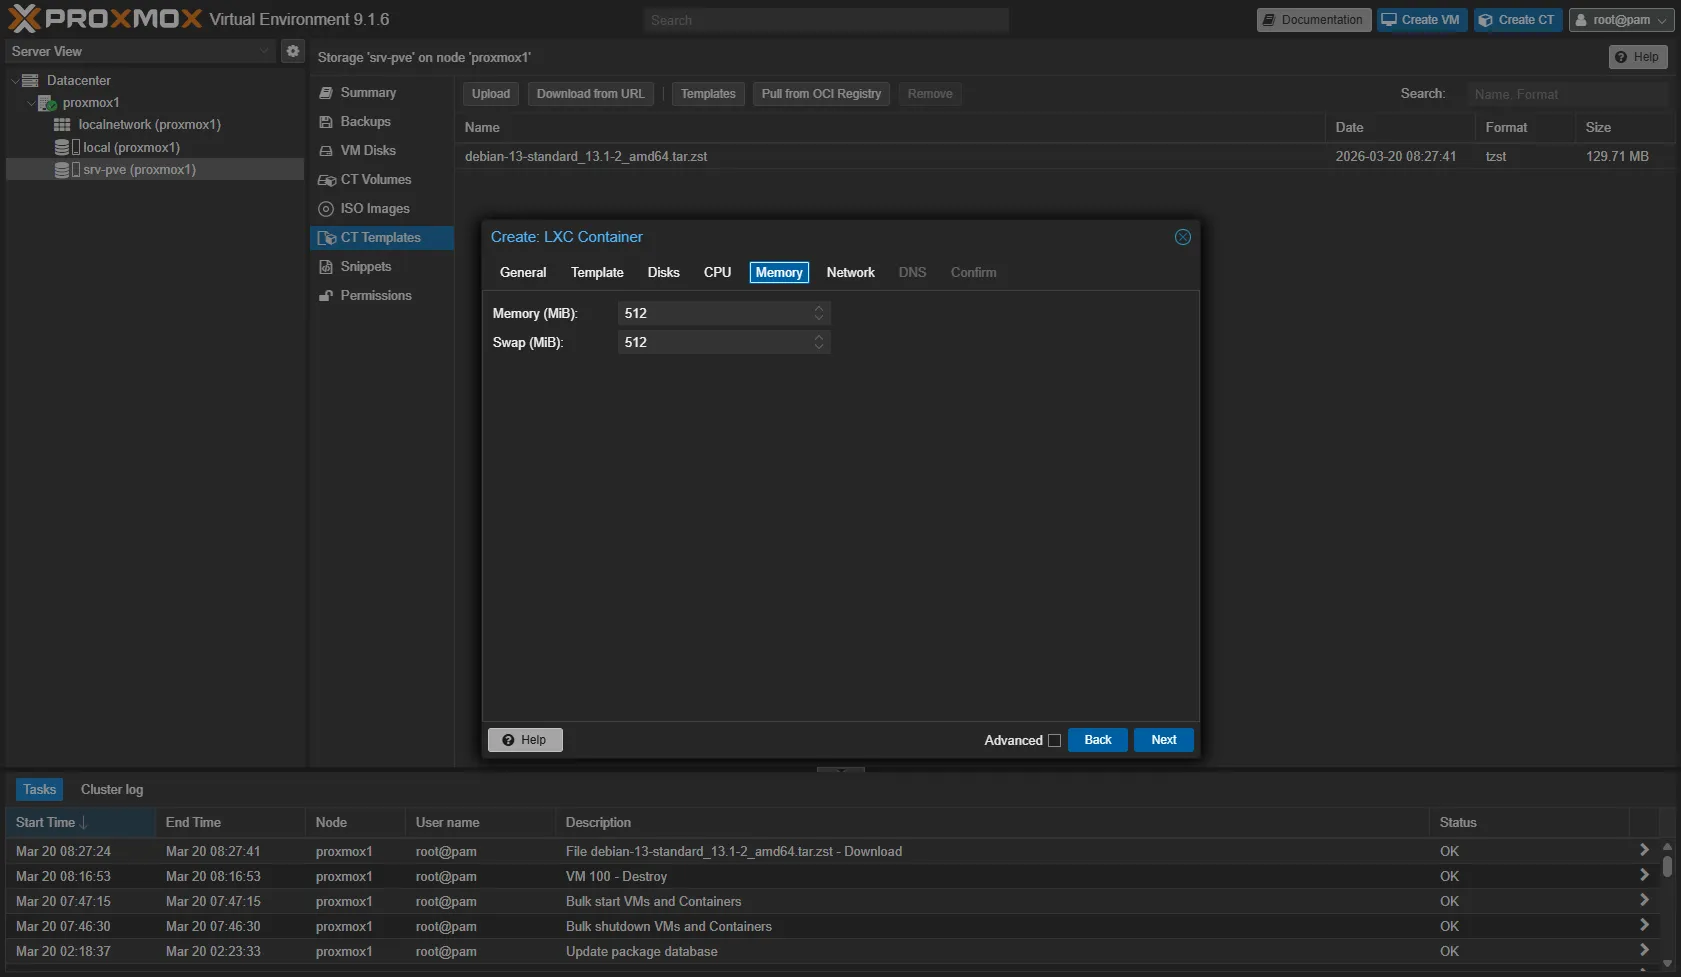
-
Network tab: networking
Option Recommended value Explanation Name eth0Interface name inside the container Bridge vmbr0Default Proxmox bridge IPv4 DHCPor static IPChoose according to your network Firewall Checked Enables the Proxmox firewall For a static IP: enter the address in CIDR format (e.g.
192.168.1.100/24) and the gateway (e.g.192.168.1.1).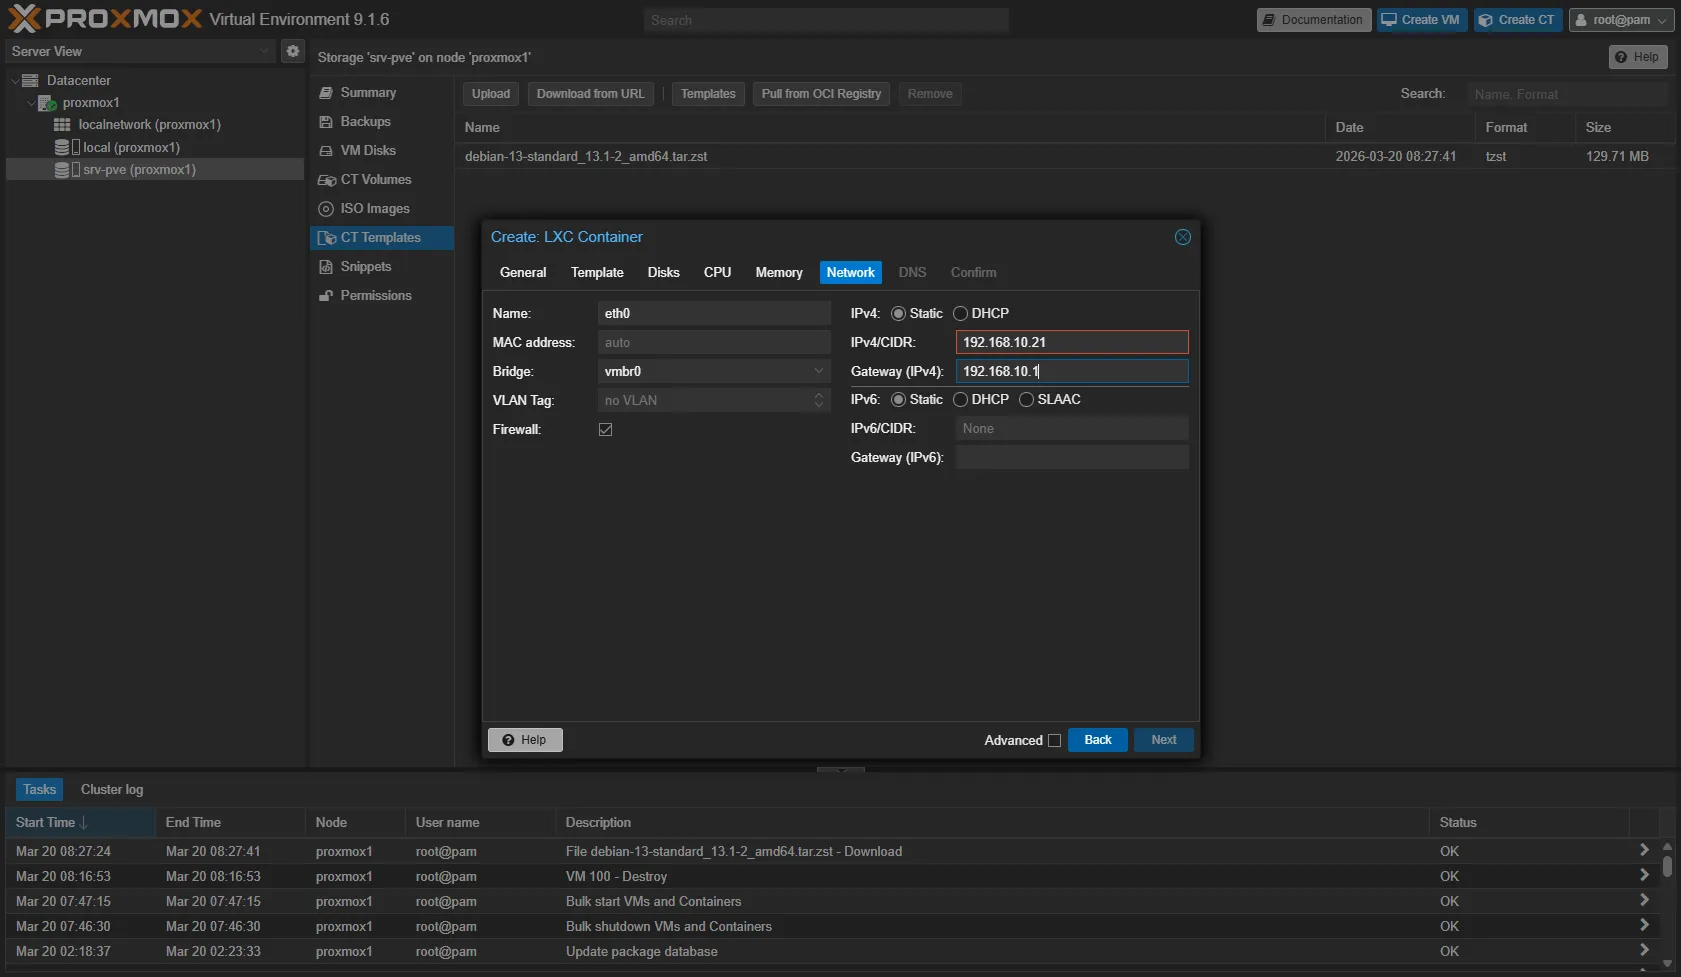
-
DNS tab: name resolution
Option Recommended value Explanation DNS domain (leave empty) Inherits from the host DNS servers (leave empty) Inherits from the host By default, the container uses the DNS settings of the Proxmox host. You can specify custom DNS servers (e.g.
1.1.1.1for Cloudflare). -
Confirm tab: check and create
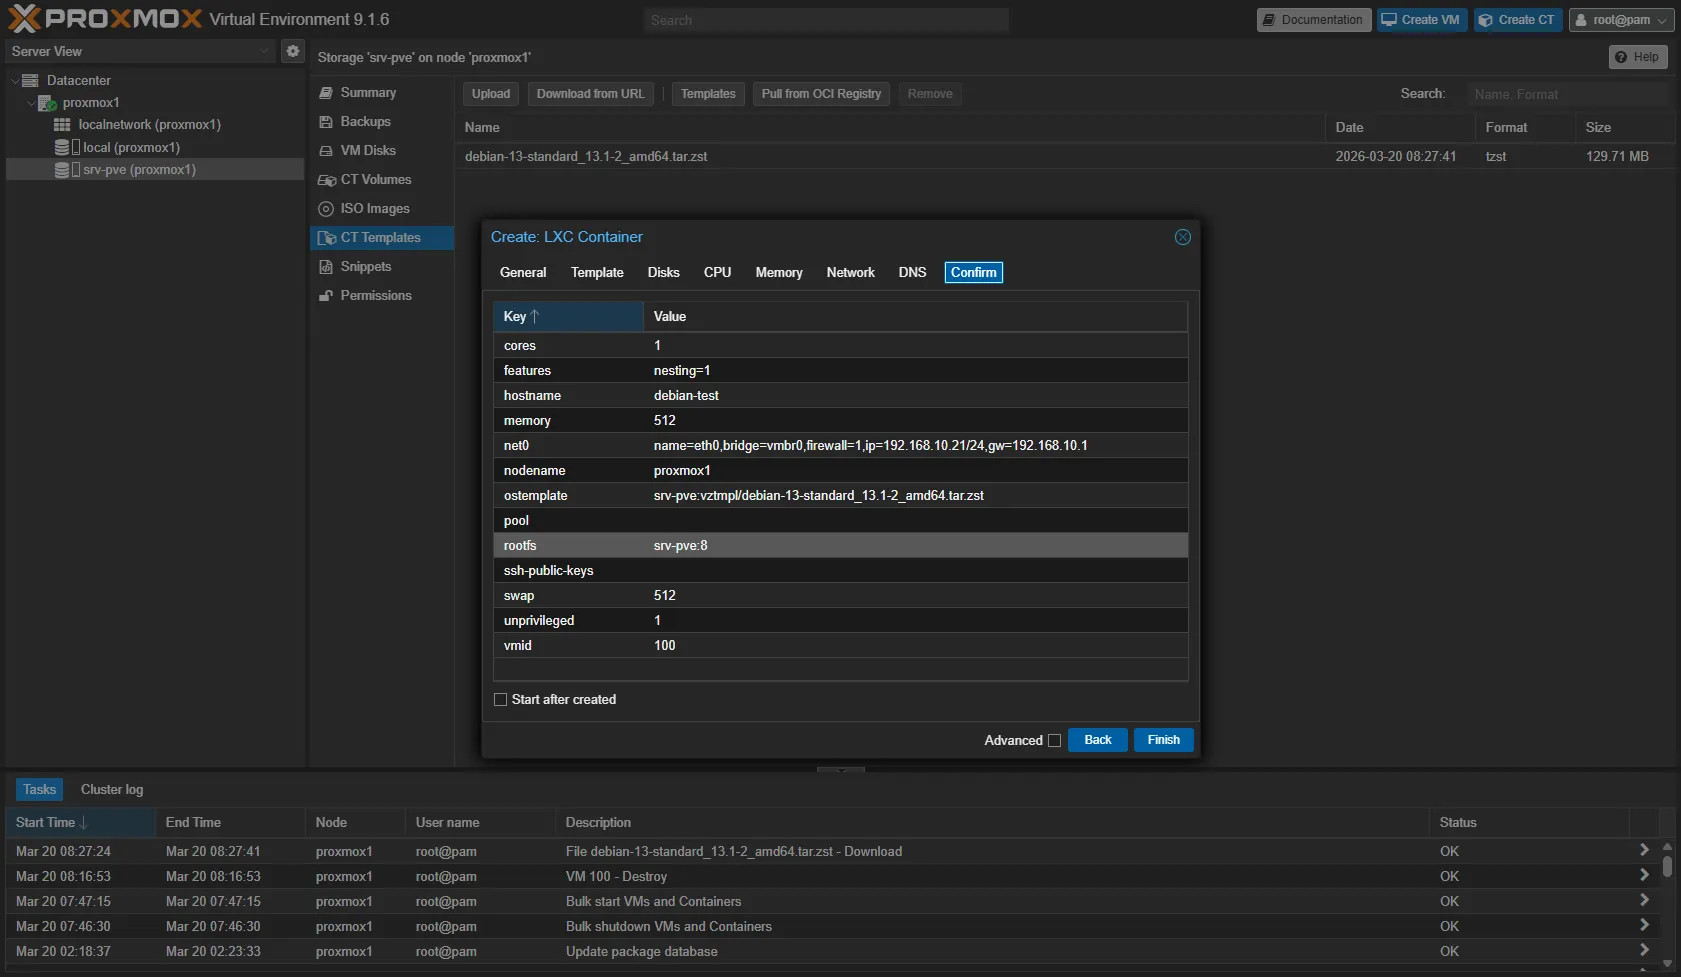
The wizard shows a summary. Check that Unprivileged is ticked, then click Finish.
Optional: tick Start after created to start it immediately.
Create the same container from the command line
The web interface calls pct create. Here is the CLI equivalent:
# Download the template (if not already done)pveam download local debian-13-standard_13.6-1_amd64.tar.zst
# Create the containerpct create 101 local:vztmpl/debian-13-standard_13.6-1_amd64.tar.zst \  --hostname debian-test \  --memory 512 \  --swap 512 \  --cores 1 \  --rootfs local-lvm:8 \  --net0 name=eth0,bridge=vmbr0,ip=dhcp,firewall=1 \  --unprivileged 1 \  --features nesting=1 \  --password "YourSecurePassword"
# Start the containerpct start 101
On a node installed on top of Debian, the local-lvm storage does not exist: replace --rootfs local-lvm:8 with --rootfs local:8. If Proxmox refuses, open the local storage to container volumes with pvesm set local --content iso,vztmpl,backup,images,rootdir,snippets.
How do you check that a resource limit applies?
The --memory and --cores values are not just a label: Proxmox translates them into cgroup limits, kernel counters that bound the container's processes. You can observe them from the host, in /sys/fs/cgroup/lxc/<ctid>/. For container 101 created above with --memory 512, once started:
cat /sys/fs/cgroup/lxc/101/memory.maxcat /sys/fs/cgroup/lxc/101/cpuset.cpus.effectiveThe first command must print 536870912, which is 512 MB expressed in bytes. The second lists the cores the container may use. These paths match Proxmox VE on Debian 13 with cgroups v2. Then compare with pct config 101: the configuration says what you asked for, the cgroups say what the kernel applies.
Swap is set separately and is added to the memory: with --memory 512 and --swap 512, the container can consume up to 1024 MB in total. For 512 MB to be a real ceiling, create the container with --swap 0, or fix it with pct set 101 --swap 0, then check that pct config 101 shows swap: 0.
To confirm the identity isolation, read the UID table from inside the container:
pct exec 101 -- cat /proc/self/uid_mapAn unprivileged container prints 0 100000 65536: the container's root is host UID 100000, over 65536 consecutive identifiers.
Access the container
Three ways to open a shell in your container:
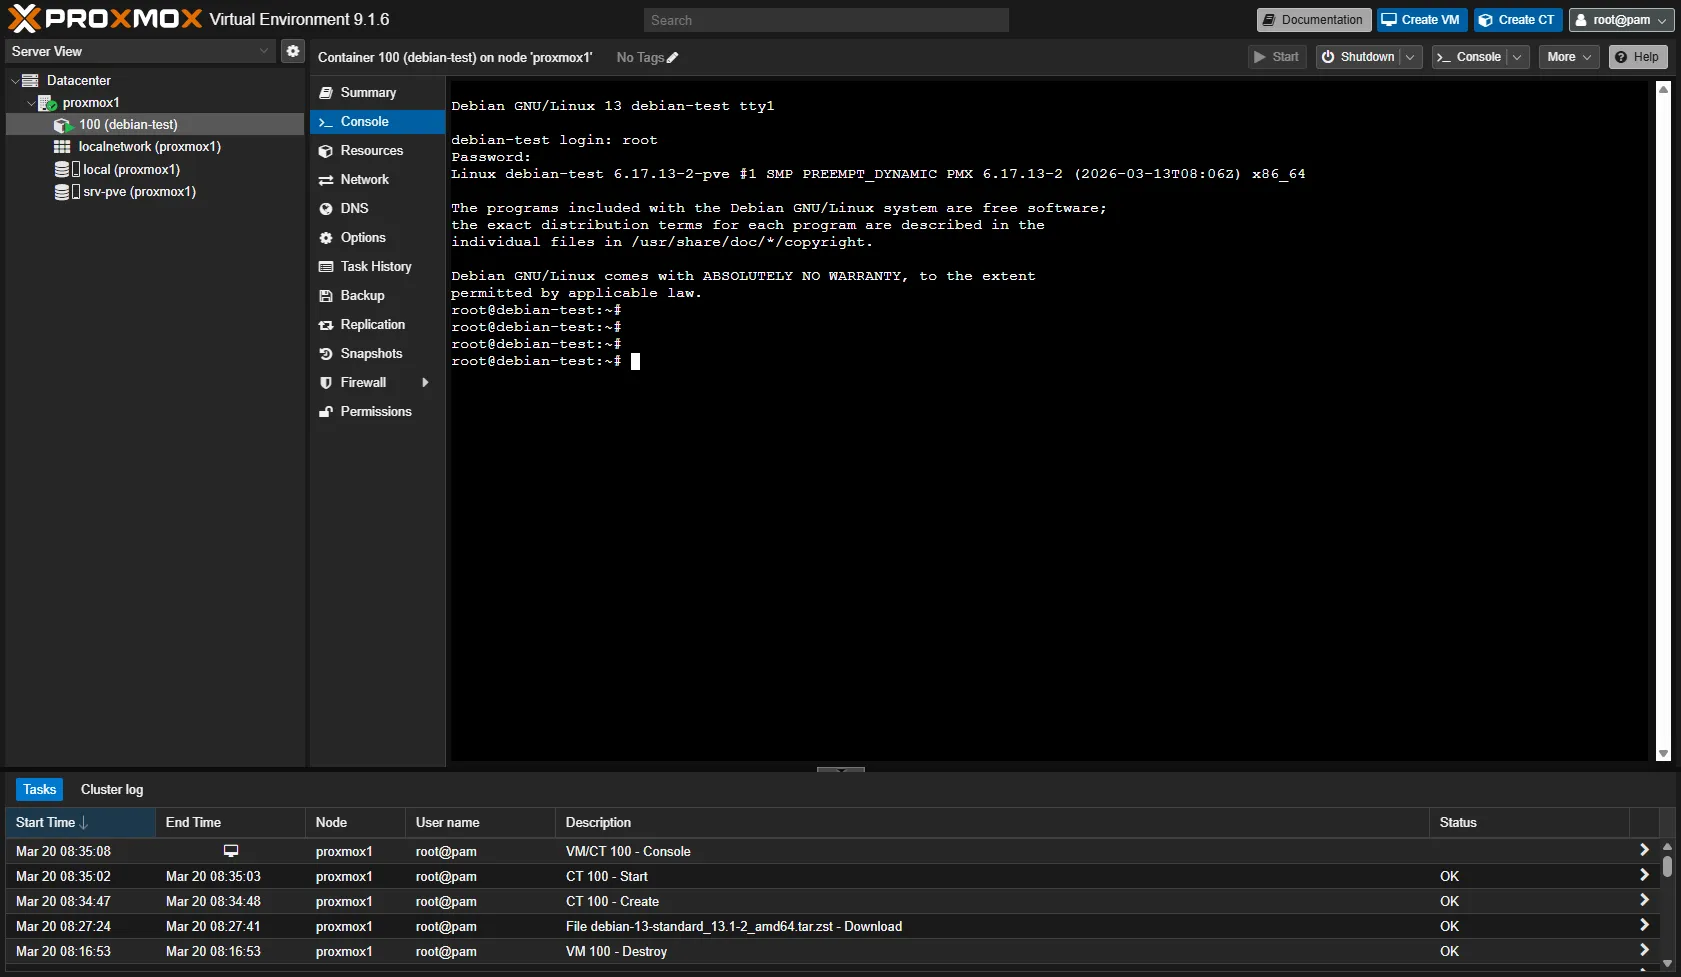
In the web interface: CT → Console. A getty session opens, log in with root and the password you set.
From the Proxmox host, enter the container's namespace directly:
# Enter the container (root shell)pct enter 101You are immediately root inside the container, without authentication. It is the fastest method for administration.
If SSH is configured in the container, connect the usual way:
ssh root@<container-ip>To find the container's IP:
pct exec 101 -- ip addr show eth0How do you run a service under a dedicated user?
A service that runs as root in the container has every right there. It is better
to create a system user for it, with no password and no login shell, and to run
the service under that identity. From the host, with pct exec:
pct exec 101 -- useradd --system --no-create-home --shell /usr/sbin/nologin webpct exec 101 -- runuser -u web -- <service-command>A process that is not root cannot, by default, listen on a port below 1024: this
is why a test service sits on a port such as 8080. To check the result, find the
container's address with pct exec 101 -- ip addr show eth0, query the port
from the host, then check the process owner with
pct exec 101 -- ps -o user=,pid=,comm= -u web.
The container's disk survives a pct reboot 101: a file written before the
restart can be read back afterwards. A process started by hand, however, does
not restart on its own; for it to come back with the container, you have to hand
it over to a systemd service.
Configure nesting for Docker
If you want to run Docker in an LXC container, here is the complete configuration:
-
Enable nesting and keyctl
Terminal window # If the container already existspct set 101 --features nesting=1,keyctl=1- nesting: exposes part of
/procand/sys - keyctl: required for Docker (kernel key management)
- nesting: exposes part of
-
Restart the container
Terminal window pct reboot 101 -
Install Docker in the container
Terminal window pct enter 101# Inside the container: Docker from the official signed repositoryapt-get update && apt-get install -y ca-certificates curlinstall -m 0755 -d /etc/apt/keyrings. /etc/os-releasecurl -fsSL "https://download.docker.com/linux/${ID}/gpg" -o /etc/apt/keyrings/docker.ascchmod a+r /etc/apt/keyrings/docker.ascecho "deb [arch=$(dpkg --print-architecture) signed-by=/etc/apt/keyrings/docker.asc] https://download.docker.com/linux/${ID} ${VERSION_CODENAME} stable" > /etc/apt/sources.list.d/docker.listapt-get updateapt-get install -y docker-ce docker-ce-cli containerd.io docker-buildx-plugin docker-compose-plugin -
Check that Docker works
Terminal window docker run hello-world
Mount a host directory (bind mount)
A bind mount gives the container access to a folder of the Proxmox host. Useful to share data or to reach NFS storage.
# Create the folder on the hostmkdir -p /mnt/bindmounts/shared
# Add the bind mount to the container (container stopped)pct set 101 --mp0 /mnt/bindmounts/shared,mp=/shared
The host folder /mnt/bindmounts/shared becomes /shared in the container.
In an unprivileged container, the container's root is host UID 100000. A folder
owned by root on the host therefore appears as owned by nobody in the
container, and refuses writes. The remedy is not to switch to privileged: it is
to give the folder to the mapped UID, that is 100000 plus the UID you want
inside the container. For root (UID 0) to write:
chown 100000:100000 /mnt/bindmounts/sharedFor a container user with UID 1000, the owner to set on the host is 101000.
The isolation stays intact: the container gets only that folder.
pct cheat sheet
The essential pct commands to manage your containers:
| Action | Command | Notes |
|---|---|---|
| Create a CT | pct create <ctid> <template> ... | See the complete example above |
| List CTs | pct list | Shows ID, status, name |
| Start | pct start <ctid> | |
| Clean shutdown | pct shutdown <ctid> | |
| Force stop | pct stop <ctid> | |
| Restart | pct reboot <ctid> | |
| Enter the CT | pct enter <ctid> | Immediate root shell |
| Run a command | pct exec <ctid> -- <cmd> | E.g.: pct exec 101 -- hostname |
| Show the config | pct config <ctid> | |
| Change a parameter | pct set <ctid> --<option> <val> | E.g.: pct set 101 --memory 1024 |
| Resize the disk | pct resize <ctid> rootfs +5G | Grow by 5 GB |
| Clone a CT | pct clone <ctid> <newctid> | Full clone |
| Create a snapshot | pct snapshot <ctid> <name> | |
| Delete a CT | pct destroy <ctid> | Warning: also deletes the data |
Troubleshooting
| Symptom | Likely cause | Solution |
|---|---|---|
| CT does not start: "permission denied" | Storage incompatible with unprivileged | Use a dir or zfspool storage (not some LVM setups) |
| No network | Misconfigured bridge | Check that vmbr0 exists and is up on the host |
| Docker fails: "keyctl" error | keyctl feature missing | pct set <ctid> --features nesting=1,keyctl=1 then reboot (the option replaces the whole feature list, so keep nesting in it) |
| UID mapping error or write refused on a bind mount | The host folder does not belong to the mapped UID (100000 + the container UID) | chown 100000:100000 <folder> for the container's root, or chown 101000:101000 for UID 1000, without switching to privileged |
| CT starts but services fail | Nesting missing for systemd | pct set <ctid> --features nesting=1 (add keyctl=1 if Docker runs in the container) |
| Template not found | Not downloaded or wrong storage | pveam list local to check |
| "Resource busy" on deletion | CT still running | pct stop <ctid> before pct destroy |
| "TASK ERROR: CT is locked" error | Previous operation interrupted | pct unlock <ctid> |
Put it into practice
The lab has you create container 170 from the Debian 13 template checked by pveam, unprivileged, with 1 core, 512 MB and no swap, then serve a page on port 8080 under the web system user. The validation reads unprivileged: 1 and the effective UID table, the page from the node and the process's ownership by web, the limits in the configuration and in the cgroups, then a file written before a container restart and read back after it.
Key takeaways
-
LXC container = Linux only, but much lighter than a VM. Ideal for Linux services, Pi-hole, Home Assistant, Nginx...
-
Unprivileged by default: keep this mode except in very specific cases. A permissions error on a bind mount is fixed with a
chownon the mapped UID, not by switching to privileged. -
Nesting + keyctl for Docker: configure these features if you want to run Docker in a container.
-
An immediate root shell:
pct enteropens the container without authentication from the host. -
Online resizing: you can grow the disk of a running container with
pct resize. -
Bind mounts with care: never mount system folders. Create a dedicated tree under
/mnt/bindmounts/. -
TurnKey templates: think of them to quickly deploy a preconfigured application (WordPress, GitLab...).
-
A limit can be observed:
memory.maxandcpuset.cpus.effectivein/sys/fs/cgroup/lxc/<ctid>/tell you what the kernel applies.