
shell labs can be played on any machine where dsoxlab installs; vm labs
also require an x86-64 machine (a PC with an Intel or AMD processor) that
exposes hardware virtualisation, which means a usable /dev/kvm file. This
lesson helps you choose where to play: your Linux workstation, the appliance in
a hypervisor, or a dedicated machine, for example a mini-PC running Debian 13.
It gives the criteria that decide, the commands that check them, and a short
list of mini-PCs for the last case. It is written for anyone discovering
dsoxlab who does not yet have a machine for vm labs.
What you will learn
- Choose between the workstation, the appliance and a dedicated machine.
- Check a machine's hardware virtualisation with three commands.
- Recognize what nested virtualisation changes when you go through a VM.
- Plan memory and disk without redoing each catalogue's arithmetic.
- Pick a mini-PC for a dedicated machine, and know where to read what comes next: installing Debian 13, then
dsoxlab.
Prerequisites
No installation is needed to read this lesson. You only need to keep in mind
the difference between a shell lab, which is played in your terminal, and a
vm lab, which starts real virtual machines: Sizing your machine for the
labs lays it out at the start, and it points to each
catalogue's figures. The steps that follow the choice are taught elsewhere:
installing dsoxlab and, for a dedicated
machine, installing Debian 13
(in French).
Which machine can you play the dsoxlab labs on?
Three options exist, and the choice depends on the system you already have and
on the labs you want to play. shell labs can be played on all three without
reservation. The difference shows with vm labs, which bring up virtual
machines next to you. They rely on KVM, the hypervisor built into the Linux
kernel: a hypervisor is the software that runs virtual machines.
| Option | What it assumes | What it brings | Its limit |
|---|---|---|---|
| Your Linux workstation | An x86-64 processor that exposes /dev/kvm | Nothing to buy, KVM directly on the hardware | The lab machines share memory with your working session |
| The appliance in VirtualBox or VMware | A Windows or Intel macOS computer, with nested virtualisation enabled on the host | No dsoxlab installation, a virtual machine ready to play | vm labs run inside a VM: nested virtualisation is mandatory |
| A dedicated Linux machine | A mini-PC or an old computer, Debian 13 for example | vm labs run without nesting, without getting in the way of your workstation | You have to choose it, install it and house it somewhere |
Windows and macOS are a special case. KVM and Incus, the two virtual machine
engines dsoxlab can drive, do not exist on these two systems. Incus is a
container and virtual machine manager built on KVM. vm labs therefore go
through the appliance. Its images are x86-64: they do not run on an Apple
Silicon Mac (M1 to M4). On those Macs, what remains is shell labs, or a
dedicated machine that you drive remotely. The lesson Installing dsoxlab
locally details these limits.
The diagram below gathers these choices into a series of questions, to be
followed from top to bottom. Each concluding answer exits to the right of its
question. The last two questions are about /dev/kvm: the next section details
them. The dedicated machine appears where no other option plays vm labs, but
you may prefer it everywhere else too.
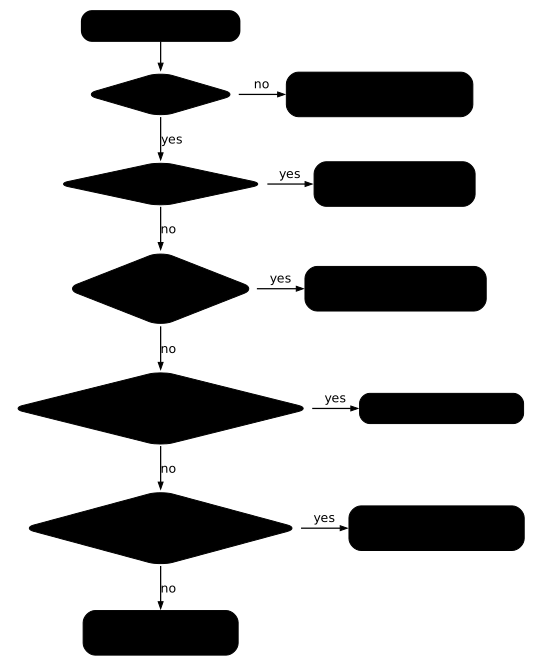
How do you know whether a machine can play vm labs?
The decisive question is whether /dev/kvm exists and whether your account
can open it. This file is the entry point of hardware virtualisation: without
it, dsoxlab provision cannot start any machine. The processor must therefore
be able to virtualize (VT-x on Intel, AMD-V on AMD). The feature must be enabled
in the BIOS or UEFI, the motherboard program that starts the computer. And if
you are already inside a VM, your hypervisor must pass it through.
Three commands are typed on the candidate machine, under Linux, before any dsoxlab installation. The first counts the logical processors for which the system declares virtualisation. The second looks for the file. The third says whether you are inside a virtual machine, and which one:
grep -Ec '(vmx|svm)' /proc/cpuinfols -l /dev/kvmsystemd-detect-virt --vmRead the three results together. A number greater than zero from grep means
that the vmx (Intel) or svm (AMD) flags are visible. An ls that displays
the /dev/kvm file is the real green light for the hardware: the right to open
it is settled afterwards, with dsoxlab doctor. Finally,
systemd-detect-virt --vm answers none on a physical machine, and the
hypervisor's name (oracle for VirtualBox, vmware, kvm...) inside a VM. If
/dev/kvm is missing, this third result tells you where to look: on a physical
machine, in the BIOS or UEFI; inside a VM, on the host.
Once dsoxlab is installed (this lesson is written against version 0.8.0),
dsoxlab doctor also checks /dev/kvm and gives its verdict on the line
"Virtualisation matérielle" (hardware virtualisation). When the file is
missing, its message tells the two situations apart: the physical machine, where
you must enable VT-x or AMD-V in the BIOS or UEFI, and the virtual machine,
where nested virtualisation is set on the host, with the machine powered off.
The page installing KVM on
Linux (in French) explains in detail
what these flags say about the processor.
Why does going through a VM complicate vm labs?
Inside a VM, the machines of a lab are machines within the machine, and that
only works if the host's hypervisor allows it. This is called nested
virtualisation. It cannot be set in the guest Linux, the one running in the VM:
you have to power the VM off and tick the option in the hypervisor, as the
lessons Installing dsoxlab locally and The
dsoxlab appliance show. On Windows, the setting
can also collide with Windows' own hypervisor, which the first of these two
lessons details. That is why a dedicated machine saves time for anyone who
plays many vm labs: the hardware gives direct access to virtualisation, with
no setting to guess.
How much memory, CPU and disk should you plan for?
Memory is the criterion that separates machines, the processor decides
whether the lab's machines start in time, and the disk only needs to be fast and
of reasonable size. A shell lab costs nothing more than your workstation. A
vm lab costs the sum of the machines its catalogue declares, because
dsoxlab provision brings them all up at once.
Each catalogue's figures are in the lesson Sizing your machine for the
labs, which reads them in the meta.yml files. To fix
ideas, the machines of the Kubernetes catalogue require 6656 MB, those of the
Ansible catalogue 5632 MB and those of the Linux catalogue 5120 MB, on top of
the system that hosts them. The sizing lesson concludes that all the published
catalogues fit, one at a time, on a machine with 16 GB or more, and that a
machine with 8 GB sticks to shell labs. To play two catalogues at the same
time, the memories add up and you should aim higher.
On the processor side, the appliance is sized for 4 vCPU (virtual processors)
and 8 GB. A processor that is too tight slows down the start of the machines:
provision then exits with code 8, because not all of them answered within the
180-second window, which the same lesson details. Aim for at least 4 vCPU for
the machine that hosts dsoxlab.
For the disk, the homelab hardware guide recommends an SSD, preferably NVMe, of at least 256 GB for a system and a few virtual machines. The sizes declared by the catalogues are ceilings, not actual consumption, as the sizing lesson explains.
When is a dedicated machine worth it?
A dedicated machine is worth it when you regularly play vm labs, or when
your workstation cannot give them the memory they require. Three situations
justify it. Your workstation is an Apple Silicon Mac, which only plays shell
labs. Your work computer has 8 GB, too little to bring up a catalogue's machines
on top of your session. Or you want to leave a training Kubernetes cluster
running without blocking your workstation.
Conversely, if you are a beginner and only want to check that dsoxlab works,
the demonstration lab and the shell labs can be played anywhere, and the
appliance covers the first vm labs without buying anything. A dedicated
machine is an investment: on a workstation with 16 GB or more, you already play
every catalogue, one at a time. To go beyond a single training machine, with
several machines, a firewall or VLANs, the guide What hardware to build a
homelab is the reference; this lesson stops at a
single machine.
Which mini-PC should you pick for a dedicated machine?
A mini-PC with a recent processor and 16 GB of memory or more is enough to
play the vm labs of one catalogue at a time. The models below are the ones
the guide What hardware to build a homelab
already recommends for hosting several virtual machines: same references, same
specifications, with no prices since they change.
| Model | Processor | Memory / storage | Positioning |
|---|---|---|---|
| Beelink SER5 | Ryzen 7 5800H | 16–32 GB / 500 GB–1 TB depending on version | Very good compromise for several VMs |
| GEEKOM A6 | Ryzen 7 6800H | 16 GB DDR5 / 1 TB | More modern, premium option |
| MINIS FORUM NAB6 | Core i5-12600H | 32 GB / 512 GB | Intel variant with two ethernet ports |
| MINIS FORUM UM790 Pro | Ryzen 9 7940HS | 32 GB / 512 GB depending on version | Good base for an admin or compute node |
All the models in the table offer at least 16 GB in the configuration quoted,
which matches the threshold of the sizing lesson. The homelab guide sets aside
the mini-PCs with an Intel N100, N150 or N250 processor: it classes them among
the budget machines, for a firewall or light services. They have four cores, and
Intel's official sheet for the
N150
gives a maximum memory of 16 GB for this model: that is just the sizing lesson's
threshold, with no margin above it. They play shell labs, but leave little
room for a vm catalogue.
The same guide also judges that used business mini-PCs offer excellent value for money. They are fine, provided you run the three commands seen above before installing anything.
The homelab guide says nothing about the hardware virtualisation of these
models. Check it on the manufacturer's sheet before buying, then with the
three commands on delivery: a mini-PC with no /dev/kvm does not play vm
labs, however powerful it is.
How do you install dsoxlab on the dedicated machine?
You first install Debian 13 with no desktop environment, then follow the dsoxlab
installation lesson as on any Linux. The guide Installing Debian 13 on a
server (in French)
shows the installation step by step, from the ISO image to the SSH server, with
a sudo account. You then drive the machine remotely, over SSH, from your
workstation: dsoxlab is a command-line tool, and the machine needs no screen.
Once connected, rerun the three commands seen above to confirm /dev/kvm, then
follow Installing dsoxlab locally: it explains
the installation with uv or pipx, and how to read dsoxlab doctor. On
Debian, dsoxlab doctor --fix installs libvirt and QEMU through apt when they
are missing. If your account does not yet have the right to open /dev/kvm, the
fix adds it to the kvm group and asks for a new login so that the change takes
effect.
dsoxlab doctorLook at the "Virtualisation matérielle" line: if it is green, the machine is
ready for vm labs. If it is red, its detail says whether to go into the BIOS or
into the host hypervisor, as described above.
Troubleshooting
These cases concern the machine, not dsoxlab: none is fixed by reinstalling the tool.
| Symptom | Cause | Solution |
|---|---|---|
/dev/kvm is missing on a physical machine | VT-x or AMD-V is disabled in the BIOS or UEFI | Enable the option in the BIOS or UEFI, save, reboot |
/dev/kvm is missing inside a virtual machine | Nested virtualisation is not enabled on the host hypervisor | Power the VM off and enable the option on the host, as the appliance describes |
/dev/kvm exists, but doctor says your user cannot open it | Your account is not in the kvm group | dsoxlab doctor --fix, then open a new session |
grep -Ec '(vmx|svm)' /proc/cpuinfo answers 0 | No hardware virtualisation is exposed to this system | Check the BIOS on a physical machine, or nesting in a VM |
provision exits with code 8 | The processor was not enough to start all the hosts within 180 seconds | Give it more processors, or lengthen DSOXLAB_HOST_READY_TIMEOUT |
Key points
shelllabs can be played whereverdsoxlabinstalls;vmlabs require an x86-64 machine with/dev/kvm.grep -Ec '(vmx|svm)' /proc/cpuinfo,ls -l /dev/kvmandsystemd-detect-virt --vmare typed before any installation.- Inside a VM, nested virtualisation is set on the host, with the machine powered off, never in the guest.
- An Apple Silicon Mac only plays
shelllabs: the images are x86-64. - For each catalogue's figures, the lesson Sizing your machine for the labs is the reference.
- A dedicated Debian 13 machine is justified for playing
vmlabs often, or when the workstation is not enough. - The mini-PCs in the table come from the homelab guide; check hardware virtualisation before buying and after delivery.
Knowledge check
Check that you have the essentials of this guide. The questions only cover what has just been explained here.
Knowledge check
Check what you have learned with this interactive quiz
How it works
- The timer starts when you click Start
- Multiple choice, true/false and short answer questions
- You can move between questions
- Detailed results are shown at the end
Starts the quiz and the timer
Review
(0/0)Score by domain
A domain groups several guides and gets several questions, so its score is more reliable than a per-topic score, which often rests on a single question.
Summary
Strengths
No topic passed at 80% on at least two questions yet.
Weak areas
No topic below the pass mark.
Recommended next
Hints before you try again?
Continue the course: Sizing your machine for the dsoxlab labs: RAM, vCPU and disk
A new full quiz with random questions
Work again only on the questions you missed